

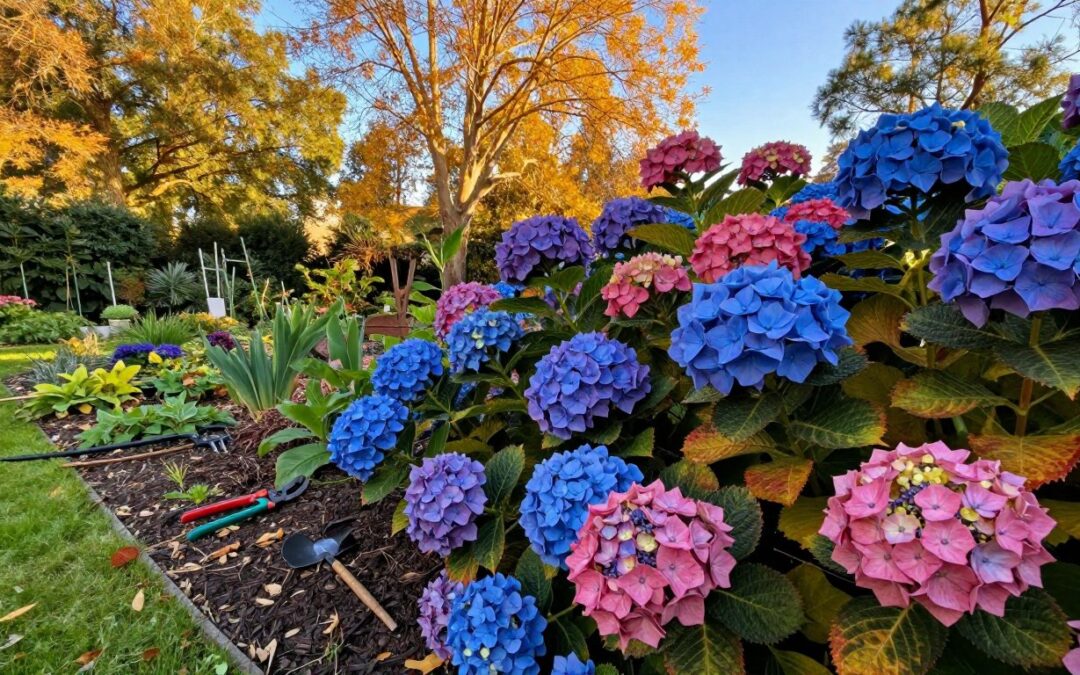

What to do with hydrangeas in the fall can make a big difference to next year’s display. Simple, timely fall care for hydrangeas — the right pruning, watering, and winter prep — helps these shrubs enter dormancy healthy and ready to produce strong blooms the following season.
As leaves change and temperatures drop, adjust your routine: identify your hydrangea type, avoid actions that remove next year’s flower buds, and focus on root and soil health. Different hydrangea varieties respond differently to fall work, so matching your technique to the plant (mophead, panicle, smooth, or oakleaf) prevents common mistakes and improves results.
Follow the practical fall tips below to protect your plants and set the stage for spectacular flowers. Want a quick checklist? See our hydrangea pruning guide or download a printable fall checklist to keep by your gardening tools.
Key Takeaways
- Understand the importance of fall care for hydrangeas and how it affects blooms next year.
- Learn pruning techniques matched to whether your hydrangea blooms on old wood or new wood.
- Discover watering and light fertilizing tips to strengthen roots before winter.
- Avoid common mistakes — especially ill-timed pruning that can remove next season’s flower buds.
- Prepare your hydrangeas for winter with mulch and basic protection so you enjoy vibrant flowers in spring.
Understanding Hydrangea Varieties and Their Blooming Habits

Knowing hydrangea types and how they set flower buds is the first step to smart fall care. Most hydrangeas fall into two practical categories: those that bloom on old wood and those that bloom on new wood. That difference determines whether fall pruning will remove next year’s blooms or be perfectly safe.
Old Wood vs. New Wood Bloomers
Old wood bloomers form their flower buds on stems that grew the previous year. By late fall those stems already contain next year’s flower buds, so heavy pruning in autumn can remove the very buds you want to keep. Examples: many bigleaf hydrangeas (Hydrangea macrophylla), including traditional mophead and lacecap types.
New wood bloomers set buds on the current season’s growth, so they are more forgiving of fall or early-spring pruning. Panicle hydrangeas (Hydrangea paniculata) and smooth hydrangeas (Hydrangea arborescens, such as ‘Annabelle’) are dependable new-wood types that perform well in colder gardens.
Common Hydrangea Types in American Gardens
Here are quick profiles and selection tips for popular varieties:
- Bigleaf (Hydrangea macrophylla) — mophead & lacecap: Classic garden favorites; often bloom on old wood. Color can shift with soil pH. Handle fall pruning lightly to protect buds.
- Panicle (Hydrangea paniculata): Hardy, blooms on new wood, and tolerates colder zones—great if you want reliable summer and fall flowers.
- Smooth (Hydrangea arborescens): Includes ‘Annabelle’; blooms on new wood and can be cut back hard in late winter or fall without losing next year’s blooms.
- Oakleaf (Hydrangea quercifolia): An attractive native with showy fall foliage and flowers on old wood; prune sparingly.
- Reblooming varieties (e.g., Endless Summer family): Many rebloomers produce flowers on both old and new wood, giving extra blooms through the season—but pruning advice can vary by cultivar.
Quick comparison (old wood vs new wood): old wood = protect buds, prune right after flowering; new wood = can prune in fall or early spring, more flexibility. If you’re uncertain which category your plant fits, consult our choosing hydrangea varieties post for photos and ID tips, or our internal hydrangea pruning guide to match technique to type.
What to Do with Hydrangeas in the Fall: Pruning Guidelines

Pruning is one of the most important fall tasks for hydrangeas because it directly affects next year’s blooms. The right pruning method depends on whether your plant blooms on old wood or new wood. Identify the type first, then follow the appropriate technique so you don’t remove flower buds that form the following season.
Pruning Old Wood Blooming Hydrangeas
Old-wood bloomers (many bigleaf or mophead types and oakleaf hydrangeas) set flower buds on last year’s stems. Cut these only immediately after flowering finishes — generally late summer to very early fall. Remove spent flower heads by cutting just below the bloom, and avoid aggressive late-fall pruning because those stems already hold next year’s flower buds.
Simple rule: Cut dead flower heads, leave structural stems that contain buds for next year. If you’re unsure whether a stem has buds, don’t cut it; wait until after bloom the following season.
Pruning New Wood Blooming Hydrangeas
New-wood bloomers (including panicle hydrangeas and smooth hydrangeas like Hydrangea arborescens ‘Annabelle’) set buds on current-season growth. That means you can safely prune them in fall or in very early spring. Many gardeners prefer to wait until spring to avoid exposing fresh cuts to winter damage, but fall cutbacks are acceptable for these types.
For smooth hydrangeas, don’t be afraid to cut back hard if you want larger, stronger flower heads next season — they respond well to a firm trim.
Timing, Tools, and a Quick Pruning Checklist
Use sharp bypass pruners for clean cuts, and make snips at a 45-degree angle just above a healthy bud to encourage new growth. Remove dead, diseased, or crossing branches to improve air circulation and reduce disease risk.
- Step 1 — Identify type: Old wood or new wood? (See our hydrangea identification guide if unsure.)
- Step 2 — Time it: Prune old-wood types right after flowering; new-wood types can be cut in fall or early spring.
- Step 3 — Cut correctly: Use bypass pruners, cut 45° above a bud, and remove only spent blooms on old-wood types.
- Step 4 — Clean up: Remove diseased material and sanitize tools between plants to prevent spread.
Not every hydrangea needs fall pruning — healthy shrubs in roomy beds can often be left to grow naturally. For reblooming cultivars (for example some in the Endless Summer family that can bloom on both old and new wood), pruning advice varies by cultivar — when in doubt, consult our hydrangea care guide for cultivar-specific tips. Following these pruning tips will help protect flower buds, promote healthy stems, and increase your chances of abundant blooms next year.
Managing Faded and Dried Hydrangea Flowers in Fall

As fall settles in, decisions about faded hydrangea flowers affect both garden appearance and plant protection. Once blooms go brown, you can either clip them off for a tidy look or leave them on for winter interest and mild protection of the buds beneath. Either choice is valid — pick what fits your garden style and wildlife preferences.
Removing spent flowers gives a neater border and may reduce places where disease can overwinter. Leaving dried blooms provides attractive texture in a dormant landscape and can shield flower buds and stems from drying winter winds. Most dried heads will break off naturally during winter; any that remain are easy to remove in spring when new growth begins.
Removing Dead Flowers Versus Leaving Them for Winter
If you prefer a polished bed, clip spent flower heads just below the bloom—this tidies the shrub without damaging structural stems. For gardeners who enjoy winter interest, leave a few dried flower heads in place; frosted hydrangea blooms are a pleasing seasonal feature and give subtle protection to the buds below.
Practical tip: when in doubt, remove only the clearly dead or diseased flower heads and leave intact stems that might shelter buds. That way you balance neatness with bud protection.
Using Hydrangea Flowers for Drying or Decorations
Want to use blooms for arrangements? Harvest for drying in late August to early September when heads shift from fresh color to a lavender-gray tone — these retain color best. Cut stems and either place them in a vase (no water) or hang upside down in a cool, dark, dry place to preserve shape and hue.
Mophead varieties are especially suited to wreaths and dried arrangements because of their large, showy flower heads. Try a simple DIY: cut stems at ideal color, remove lower leaves, tie in small bunches, and hang to dry. See our DIY hydrangea wreath tutorial for step-by-step photos and wreath-making tips.
Choices for managing faded hydrangea flowers: remove, leave, or harvest
| ActionDescriptionBenefits | ||
| Remove Dead Flowers | Clip spent blooms just below the flower head. | Creates a tidy appearance; reduces disease risk. |
| Leave Flowers Intact | Allow dried blooms to remain on the plant. | Provides winter interest; helps protect buds from wind. |
| Harvest for Drying | Cut blooms in late summer when they turn lavender-gray. | Ideal for decorative arrangements and wreaths. |
How you manage faded flowers is largely a matter of preference — both approaches are horticulturally sound when done carefully. If you plan to dry blooms, harvest at the recommended time for best color retention; if you leave them, enjoy the structure and wildlife value they bring to a late-season garden.
Watering Hydrangeas During the Fall Season
As temperatures cool, adjust how you care for your hydrangeas so roots stay healthy through the season. Even if fall brings more rain, these shrubs still need consistent deep watering to build strong root systems before winter — generally a thorough soak about every two weeks, adjusted for local rainfall and soil type.
Adjusting Watering Frequency with Cooler Weather
Fall watering is less frequent than in summer, but deep irrigation is critical for root development. In sandy or fast-draining soil, water more often; in clay or moisture-retentive soil, reduce frequency. To check moisture, push your finger 2–3 inches into the soil: if it feels dry at that depth, give the plant a good soak so moisture reaches the whole root zone.
A well-hydrated root system improves winter survival and supports vigorous spring growth. Remember that hydrangeas continue metabolic activity until fully dormant, so don’t stop irrigation abruptly as temperatures drop.
Benefits of Drip Irrigation for Fall Hydrangea Care
Installing a drip irrigation system can significantly benefit your hydrangeas in autumn. Drip delivers water directly to the soil at the base, minimizing evaporation and keeping foliage dry — an important disease-prevention step since wet leaves in cool weather can encourage fungal problems.
Drip systems are especially helpful when rainfall is unpredictable. Automated timers prevent drought stress and ensure roots receive regular moisture. If you don’t have drip, a slow, deep hand-watering or soaker hose early in the day works well; watering in the morning lets any surface moisture dry before cooler nights.
| ActionDescriptionBenefits | ||
| Check Soil Moisture | Insert finger into the top 2–3 inches of soil. | Ensures plants receive water only when needed. |
| Use Drip Irrigation | Install a drip system or soaker hose for consistent watering. | Minimizes evaporation and reduces disease risk by keeping foliage dry. |
| Water Early | Water in the morning so leaves dry before night. | Reduces fungal disease risk from overnight moisture. |
Need local supplies or installation help? Find a nearby nursery or irrigation service near you. For more detailed, cultivar-specific watering advice, see this guide on hydrangea care which covers soil types, root health, and seasonal adjustments.
Fertilizing Hydrangeas in the Fall — What You Need to Know

Fertilizing in fall requires restraint. Heavy late-season feeding can encourage tender new growth that won’t harden off before cold weather, increasing the risk of winter damage and fewer blooms the next year. Instead, focus on soil health and conservative, slow-release options when needed.
Here are practical, low-risk approaches for fall fertilizing:
- Avoid standard high-nitrogen feeds in autumn — they stimulate soft shoots vulnerable to frost.
- Time your last regular fertilizer application for late summer so any stimulated shoots have time to harden off before freezing temperatures.
- If you want to add nutrients in fall, choose a light application of a balanced, organic slow‑release product (many gardeners use Holly‑tone or similar organic formulas). These break down gradually and pose less risk than soluble synthetic fertilizers.
- Remember that organic options rely on soil microbial activity, which slows in cold weather; they’re a gentle way to supply spring-available nutrients without pushing late growth.
- Prioritize maintaining proper soil pH and adding organic matter (compost or well-rotted manure) rather than heavy feeding in fall — good soil leads to healthier buds and stronger plants the following year.
- Be cautious about over-fertilizing: lush foliage now can reduce the plant’s ability to set and protect buds for next spring.
Zone note: recommendations vary by climate. In mild-winter areas you may be able to apply a modest organic feed later in fall; in cold climates, skip fall feeding and concentrate on spring applications. For cultivar-specific guidance and product suggestions, consult our care resources or your local extension.
Want a quick checklist? Download our fall fertilizer checklist or review product options in our hydrangea care resources to pick a gentle, season-appropriate approach that supports strong spring blooms.
Fall Planting and Transplanting for Hydrangea Health

Fall is one of the best times to plant new hydrangeas or move existing ones because cooler air temperatures and regular autumn rainfall let roots grow without the stress of hot weather. Planting in autumn gives shrubs a chance to establish a strong root system in warm soil before winter dormancy, which often leads to better performance the following spring.
When planting or transplanting, consider soil preparation and placement now so your hydrangeas will thrive in their new spot. If you plan beds and color combinations while plants are still in bloom, it’s easier to visualize spacing and variety choices.
If you need local supplies or professional help, find a nearby nursery or landscape service near you.
Practical tips for successful fall planting and transplanting:
- Choose fall for planting: Cooler air reduces transplant shock and warm soil encourages root growth.
- Prepare the planting hole: Dig a hole wide enough for the root ball and amend heavy soils with compost for better drainage and root contact.
- Set the plant correctly: Place the root crown level with the surrounding ground and backfill with native soil mixed with organic matter.
- Water deeply: Hydrangeas need thorough watering immediately after planting and regular deep soaks through autumn while roots establish.
- Timing: Finish planting or moving at least six weeks before your typical first hard frost when possible; in colder zones allow additional time for root settling.
- Transplant dormancy tip: If moving established shrubs, aim for dormancy (after leaves drop) to reduce stress, but minor moves can be done earlier with careful watering and root-ball care.
| ActionDescriptionBenefits | ||
| Plant New Hydrangeas | Place hydrangeas in the ground during fall. | Cool temperatures reduce transplant shock; soil warmth supports root establishment. |
| Transplant Existing Hydrangeas | Move plants after leaves drop or when minimally active. | Minimizes stress and preserves root health for better establishment. |
| Water Deeply | Ensure adequate hydration after planting and during establishment. | Helps plants settle in and prepares them for winter dormancy. |
For variety selection, consider hardy types like panicle hydrangeas (Hydrangea paniculata) and hydrangea arborescens for colder sites, and refer to our guide on the best hydrangea varieties for planting to match performance to your garden conditions. Download our printable fall planting checklist to make sure you don’t miss critical steps.
Preparing Your Hydrangeas for Winter
Preparing hydrangeas for winter helps protect buds and stems so you get healthy, vigorous flowers next spring. As temperatures fall, take simple, proactive steps for both in-ground and container-grown plants to reduce winter injury and preserve root health.
For in-ground hydrangeas, apply a 2–3 inch layer of organic mulch — shredded bark, pine needles, or compost — around each shrub (keep mulch a few inches from the stems). Mulch insulates roots against freeze–thaw cycles and helps the ground retain moisture during dormancy.
Protecting In-Ground Hydrangeas
If your hydrangeas are exposed to drying winter winds, consider a burlap windscreen around vulnerable mophead and lacecap varieties to limit desiccation of stems and buds. Remember that some types, such as panicle hydrangeas and smooth hydrangeas (Hydrangea arborescens), are more cold-hardy and typically need less protection than bigleaf varieties.
Zone guidance: In milder winter zones, a simple mulch layer and leaving some dried blooms for interest may be enough. In colder zones, add windscreens and extra mulch around the root zone; if temperatures are expected to drop into extreme cold, understand that protection has limits and very late-season blooms may suffer.
Care Tips for Container Hydrangeas
Potted hydrangeas need special attention because the root ball freezes faster than in-ground plants. Move containers to a sheltered location (an unheated garage, lean-to, or against a foundation) or bury the pot in the ground. Alternatively, wrap the container with insulating material (bubble wrap, burlap, or a horticultural blanket) and place mulch on top of the soil in the pot.
Monitor moisture: pots can dry out through winter winds, so check periodically and water thoroughly if the soil is dry but above freezing. For step-by-step container protection, see our post on overwintering potted hydrangeas.
Cleaning and Maintenance to Prevent Diseases
Fall cleanup reduces disease and pest pressure. Rake and remove fallen leaves and debris that can harbor fungal spores and pests. In some areas, pests such as Chilli Thrips have been reported to damage foliage — removing debris and maintaining plant health helps reduce overwintering populations.
Avoid heavy pruning in late fall. For old-wood bloomers, pruning now can remove next year’s flower buds; for many types, leaving a few dried flower heads in place offers bud protection and winter interest. Remove any obviously diseased material and do a thorough cleanup in early spring when new growth appears.
Finally, water deeply one last time before the ground freezes so plants enter dormancy well-hydrated. Completing winter prep tasks before the first hard freeze gives hydrangeas the best chance to emerge healthy next season. For a printable winter prep checklist, download our guide and follow zone-specific tips to tailor protection for your yard.
| ActionDescriptionBenefits | ||
| Apply Mulch | Spread 2–3 inches of organic mulch around shrubs, avoiding direct contact with stems. | Insulates roots and conserves moisture. |
| Install Windscreen | Use burlap to shield exposed hydrangeas from cold winds. | Protects buds and stems from desiccation. |
| Move Containers | Relocate pots to sheltered areas or insulate and bury them. | Prevents root freezing and maintains moisture. |
| Clean Up Leaves | Rake and dispose of fallen leaves and debris. | Reduces disease risk and pest habitat. |
| Water Deeply | Hydrate plants thoroughly before ground freezes. | Ensures plants enter winter well-hydrated for better spring growth. |
Conclusion
How you manage your garden in the fall has a direct impact on hydrangeas blooming the next year. Follow a simple philosophy: plant in the right location, water deeply and appropriately for your soil, and prune only when it’s safe for the type you have. Those small seasonal steps set the stage for vibrant flowers from spring through the next season.
Knowing whether your hydrangea blooms on old wood or new wood is crucial — it prevents the common mistake of removing next year’s flower buds with ill-timed pruning. In general, reduce watering gradually, skip heavy fall fertilizer in colder zones, and clean up fallen leaves to lower disease risk. Smooth and panicle hydrangeas offer more flexibility for fall care, while mophead and oakleaf varieties usually need a lighter touch.
Look forward to early spring as the time to assess winter damage and make corrections: remove any dead stems, tidy the bed, and perform any necessary pruning once new growth appears. The effort you invest this fall will pay off with healthier plants and better hydrangeas bloom performance next season.
Want more help?
- Read our full hydrangea care guide for detailed, cultivar-specific recommendations.
- Check the hydrangea pruning guide to match pruning technique to your plant type.
- Explore the best hydrangea varieties for your garden if you’re planning new plantings.
- Find a local nursery or landscaping service near you for supplies or professional help.