Curious which sealer will actually keep your patio looking fresh without hiding natural color? This buyer’s guide explains paver protection in detail: a sealer system that helps patios, driveways, and pool decks stay cleaner, resist damage, and remain easier to maintain over time. You’ll get clear information on performance, appearance, and real-world durability rather than marketing claims.
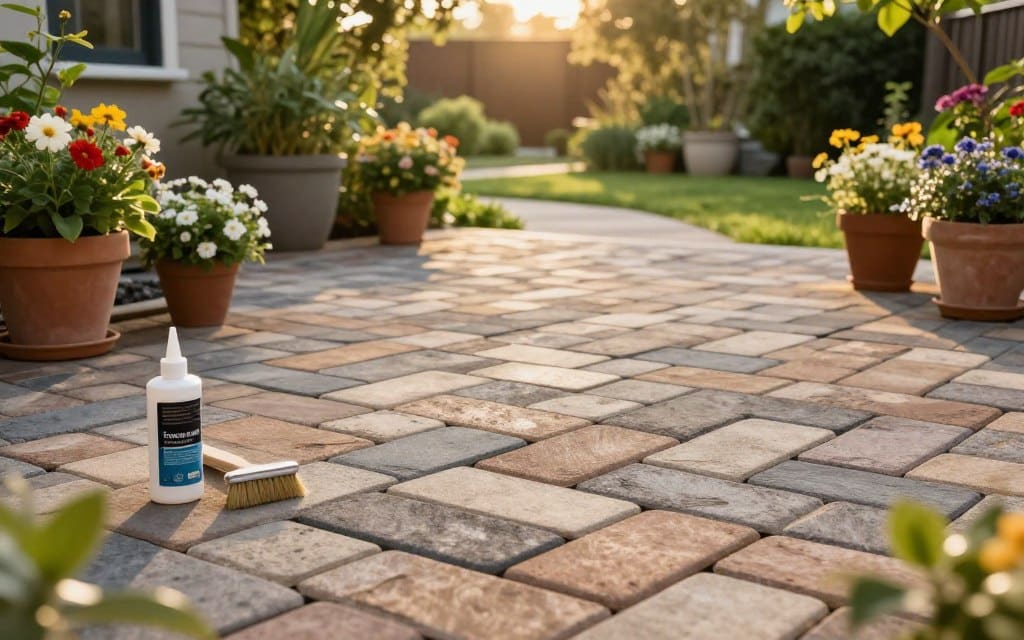
We introduce SealGreen paver sealer, a water-based, low-VOC concentrate that works as a penetrating silane/siloxane repellent. It ships in concentrate form and is meant to be mixed and applied with a pump sprayer for even coverage and minimal lap marks.
Read on to learn how to compare product types for different materials, why prep and application matter, and how to plan maintenance and reapplication so you can pick the right finish for your climate and traffic.
Key Takeaways
- “Paver Protection” refers to sealers that reduce absorption and ease upkeep.
- Look for technical data on breathability and absorption reduction, not just marketing.
- Concentrate formats often save on shipping and let pros mix jobs efficiently.
- Pump sprayers help achieve even coverage with penetrating repellents.
- Use reviews as a screen, but prioritize label directions and published data.
What Paver Protection Does and When It’s Worth Buying
When traffic, sun, or salt threaten an outdoor surface, the right sealer can extend life and ease upkeep. A quality paver sealer reduces water absorption and limits stain uptake so surfaces dry faster and resist weathering.
Patios see fewer food and drink marks, driveways shed oil and road grime better, and pool decks stand up to sunscreen and splash-zone buildup. In short, sealing helps keep color and sand joints intact while making routine cleaning quicker.
When sealing moves from optional to worth it
Choose sealing when use or exposure raises risk: heavy foot or vehicle traffic, frequent spills, intense sun in the Southwest or Florida, coastal salt air, or deicing salts in northern states. Freeze-prone areas also benefit because absorbed water can speed scaling during freeze-thaw cycles.
How to decide and test
Match the product type to the material and your goal — natural look or enhanced color — and plan prep and application to avoid haze. Always try a small test area to confirm absorption rate, appearance, and compatibility before full application.
One layer, not a cure-all
Remember: a sealer is one part of maintenance. It won’t fix poor drainage, base failure, or structural issues. Use it as a targeted product to reduce water damage and staining, not as a substitute for proper installation or repairs.
| Concern | When to consider sealing | Expected benefit |
|---|---|---|
| High UV / sun | Southwest, Florida | Slows color fade, reduces chalking |
| Coastal salt | Seaside homes | Limits salt-driven staining and efflorescence |
| Heavy use | Driveways, busy patios | Less staining, easier cleaning |
Common Problems a Paver Sealer Helps Prevent

Small leaks, frequent spills, and shaded damp spots accelerate wear on walkways and patios. A good sealer reduces water entry below the surface and lowers the chance of many common failures.
Water intrusion and surface damage
Water that soaks in darkens color and can freeze, causing spalling or scaling in cold climates. Wet joints lose sand and stabilize poorly, which speeds wear in high-traffic zones.
Stains from oil, food, and dirt
Everyday spills — oil drips on driveways, grease on patio furniture, and ground-in dirt — make surfaces look tired fast. Treating early is cheaper than removing set-in stains with harsh cleaners.
Mold and mildew in shaded areas
Shaded, damp spots stay wet longer. That environment promotes mold and mildew growth, which creates slippery films and stubborn discoloration unless properly cleaned before application.
Efflorescence and timing
Efflorescence is white salt deposits that form when water brings minerals to the surface. Sealing too soon can trap moisture or salts and worsen the problem. Clean and let the area dry fully so the sealer locks in true color, not residue.
| Problem | Common cause | Quick prevention step |
|---|---|---|
| Darkening & scaling | Water intrusion and freeze-thaw cycles | Use a penetrating water repellent after full drying |
| Set-in stains | Oil, food, and dirt left on surface | Clean spills promptly; seal after stain removal |
| Mold and mildew | Persistent damp/shade | Apply appropriate cleaner; ensure sunlight or airflow before sealing |
| Efflorescence | Mineral salts migrating with moisture | Remove salts, allow drying, then apply sealer |
Choosing a penetrating versus film-forming product changes how you mitigate these risks; the next section explains those differences and why breathability matters.
Paver Sealer Types Explained: Penetrating Water Repellent vs Film-Forming Coatings
Choosing between a penetrating treatment and a surface coating shapes both look and long-term performance. This section compares how each form works, when to use it, and why breathability matters for outdoor masonry.
How penetrating silane/siloxane treatments work
Silane/siloxane water repellents soak into pores and capillaries to create a hydrophobic zone beneath the surface. They do not form a topical film, so texture and color stay natural.
SealGreen paver sealer is a silane/siloxane repellent that can penetrate up to 1/4 inch and is 100% water vapor permeable (ASTM D1653). That lets vapor escape while keeping liquid water out.
When film-forming coatings make sense
Film-formers sit on top of the substrate and give gloss or a wet look. They can enhance color but risk trapping moisture, whitening, or peeling if prep or drying is poor.
Use film-formers only on well-prepped, consistently dry patios where appearance beats long-term breathability.
| Type | Primary benefit | Key risk |
|---|---|---|
| Penetrating water repellents | Natural look, vapor permeable | Poor performance if applied over damp material |
| Film-forming sealers | Stronger color enhancement, gloss | Trapped moisture, haze, peeling |
| Buying priority | Breathability to avoid moisture issues | Strict prep and dry conditions required |
Finish Options: Natural Finish, Wet Look, and Gloss Considerations

Choosing the right finish balances appearance, traction, and long-term performance. Some finishes barely change look, while others deepen color and add shine. Your choice affects slip resistance, maintenance, and how the surface ages.
Natural finish for minimal change and traction
A natural finish aims to protect the surface while keeping original color, texture, and grip. This is often the safest option for pool decks, steps, and walkways where slip resistance matters. SealGreen is an example of a clear, non-yellowing product with little to no gloss and minimal appearance change.
Wet look and gloss: color enhancement vs slip risk
Wet-look or high-gloss coatings deepen color and give a “finished” appearance. They can make materials look richer but may reduce traction when wet. Consider glossy options only for covered patios or low-slip areas, and avoid them where kids, pets, or pool use increase risk.
Avoiding haze and whitish film
Haze often comes from residual moisture in the substrate, over-application, ponding, or incompatible prior products. Unilock warns that trapped moisture or re-coating too soon can produce a whitish film.
Prevent haze by applying thin, even coats, following recoat windows, and never sealing immediately after rain. Test a small, inconspicuous area to confirm sheen and color before full application.
| Finish | Visual effect | Best use | Main risk |
|---|---|---|---|
| Natural finish | Minimal change, low sheen | Pool decks, steps, high-traffic walkways | Less color enhancement |
| Wet look | Deeper color, noticeable sheen | Patios, show areas with low slip concern | Reduced traction when wet |
| Gloss (high sheen) | High shine, dramatic color boost | Covered patios, display areas | Haze from moisture; slip risk |
Paver Protection for Different Surfaces and Materials
Surface texture and porosity dictate how deeply a repellent must penetrate and how much to apply. Match the treatment to the dominant material before adjusting technique for mixed jobs.
Concrete, split-face block, and large-pore concrete
Concrete pavers and exposed aggregate can be highly absorbent, so coverage rate varies depending surface porosity. Split-face block and large-pore units need deep penetration and high water vapor permeability to avoid whitening or trapped moisture.
Brick and mortar joints
Clay brick and mortar absorb at different rates. Test a small area to confirm uniform uptake and avoid over-applying on tighter units.
Natural stone and terra cotta
Limestone and sandstone usually take more product than granite. Verify label suitability for each stone type before full application.
Vertical vs horizontal use, and paint prep
Walls face wind-driven rain; horizontal surfaces face standing water, spills, and abrasion. Some penetrating treatments can act as a pretreatment to keep exterior masonry drier before paint—always test compatibility first.
| Material | Porosity | Application focus |
|---|---|---|
| Exposed aggregate / concrete pavers | High | Higher coverage, deep-penetrating product |
| Split-face block | Very high | Vapor-permeable repellent, avoid film-formers |
| Granite / dense stone | Low | Lower uptake; test for appearance change |
What to Look For in a Paver Protection Product Label

A clear label can save you time and money by revealing how a product performs, not just how it looks.
Prioritize published ASTM-style results over vague marketing. Key metrics are percent reduction in water absorption and leakage reduction on masonry assemblies. Also check that the product remains vapor permeable so trapped moisture won’t cause whitening or scaling.
Look for resistance claims in plain terms. Mildew and fungus resistance matters for shaded areas. Alkali resistance means the chemistry won’t break down on concrete. Chloride or salt defense is essential near coasts and for deicer use.
For cold regions, seek deicer-scaling or freeze-thaw testing. A statement of “little to no change” after ASTM C672 cycles is a strong signal for long-term freeze thaw durability in the United States.
VOC compliance and water-based formulas make handling easier and cleanup safer for homeowners. Finally, use reviews to confirm application tips and appearance, but verify performance with the published technical data.
| Label Signal | What it Means | Why it Matters |
|---|---|---|
| Percent absorption reduction | Shows how much less water the surface takes in (e.g., 91% for concrete) | Predicts stain resistance and drying speed after rain or spills |
| Leakage / assembly test | Measures water penetration on built-up masonry (e.g., 99.9% reduction) | Indicates real-world moisture control for walls and decks |
| Vapor permeability (ASTM D1653) | Confirms breathability (100% means vapor can pass) | Reduces risk of whitening and freeze-thaw damage |
| Resistance claims & VOC | Mildew/fungus, alkali, chloride defense; VOC | Shows suitability for shaded sites, concrete chemistry, coasts, and safe handling |
Surface Prep and Cleaning Before Sealer Application
A clean substrate lets a sealer work as designed instead of trapping old stains. Prep determines penetration, drying, and final appearance. Take time here to avoid costly fixes later.
Removing contaminants: focused lists
Remove dirt, dust, and visible efflorescence before any application. Clean away grease, oil spots, asphalt marks, laitance, curing compounds, paint overspray, and old coatings.
Contaminants block product uptake and can lock stains beneath the finish. Budget time for targeted removal rather than assuming one pass will suffice.
Cleaning options: tools and when to use them
Pressure washing works for general soil but use controlled pressure and maintain distance to protect joint sand. Water-blasting suits stubborn residue and large stains.
Chemical cleaners are best for mineral deposits, oil, and paint; always neutralize and rinse fully per label instructions to avoid residue that repels water.
Targeting mold and mildew
Mold mildew films often return if only wiped with soap and water. Use a dedicated cleaner designed for biological growth when you see black or green staining.
Apply per directions, scrub as needed, then rinse thoroughly so the surface is free of residues before application.
Drying time: a non-negotiable step
After any water-based cleaning, plan at least 72 hours of drying time before sealer application. New concrete must cure about 28 days first.
Lingering moisture causes clouding, uneven penetration, and poor adhesion—inspect low spots and joints for dampness before starting.
| Method | Best for | Key precautions |
|---|---|---|
| Pressure washing | General soil, loose grime | Use moderate pressure; avoid washing out joint sand |
| Water-blasting | Stubborn residue, asphalt, heavy soiling | Adjust tip and distance; protect nearby plants and glass |
| Chemical cleaners | Oil, paint overspray, efflorescence, mold mildew | Neutralize/rinse fully; follow label safety and dwell times |
| Soap & water | Light dirt and routine maintenance | Not enough for biological or heavy oil stains |
Application Methods, Tools, and Best Practices
Good technique beats guesswork; how you apply a sealer determines final look and long-term performance.
Tool choice and cleanup. For large jobs use a low-pressure sprayer (max 150 psi) with a fan nozzle. A pump sprayer speeds coverage and reduces lap marks. Rollers or brushes work well for edges, stairs, and tight verticals.
Keep equipment clean. Rinse sprayers, roller covers, and brushes with soap and water immediately after use. Leftover residue can drip and cause spotting on fresh surfaces.
Coverage, flooding, and visual cues
Expect 70–175 sq ft per gallon depending on absorbency. On verticals apply a flooding pass and let product run down 6–8 inches before leveling.
Horizontals should briefly pond—surface looks uniformly wet and then absorbs. If it soaks instantly you need more product; if puddles persist, you applied too much.
Wet-on-wet and recoat windows
For even penetration do two coats with a wet-on-wet recoat within 3–5 minutes. That second pass evens coverage without waiting for the first coat to dry.
Weather rules and timing
Apply between 40–110°F. Avoid windy days to reduce overspray and protect nearby glass and metal. Do not apply if rain is expected within 4 hours after application or if rain occurred within the previous 72 hours.
| Step | Why it matters | SealGreen guidance |
|---|---|---|
| Spray method | Fast, even coverage | Low-pressure fan nozzle, max 150 psi |
| Coverage rate | Plan gallons and avoid waste | 70–175 sq ft per gallon depending on absorbency |
| Recoat timing | Even penetration, fewer lap marks | Wet-on-wet within 3–5 minutes; two coats recommended |
| Dry time / return to service | Safety and durability | Dry to touch 2–6 hours; allow longer before vehicles |
Practical workflow. Mask adjacent materials, test a small area first, and work in manageable sections. Maintain a wet edge and keep a pump sprayer and a roller handy for touch-ups.
How Concentrates, Quart Sizes, and Gallon Coverage Impact Value
Choosing the right container size can change the real cost and convenience of a sealing job.
Concentrate form saves on shipping and storage but adds mixing on site. SealGreen ships as a concentrate that stretches to many gallons when diluted. That can lower per‑gallon cost but means clear labeling and accurate mixes are part of the workflow.
Ready‑to‑use product helps small homeowners and DIYers avoid dilution errors. It speeds the day of application for a small patio or step repair and reduces mistakes for first‑time users.
Estimate needs by measuring square footage, then use the 70–175 sq ft per gallon range listed by manufacturers. Rough or open‑faced pavers consume more; smooth, dense surfaces use less. Buy enough for the full job plus a 10% buffer so color and repellency match across the whole area.
Quart concentrate and quart concentrate makes a sensible test kit. Use quarts for panels, spot repairs, or steps instead of committing to a full gallon. Compare published solids and active content to judge true value, and check user review data for real coverage numbers rather than vague “great value” claims.
| Form | Best use | Pros | Cons |
|---|---|---|---|
| Concentrate | Large jobs, pro crews | Lower shipping cost, more gallons per container | Requires accurate mixing; storage of concentrate |
| Ready‑to‑use | Small patios, first-time users | Convenient, no dilution errors | Higher shipping per gallon, more storage space |
| Quart (concentrate/test) | Test panels, spot fixes | Cost-effective for trials; quart concentrate makes multiple gallons | Limited volume for large coverage |
Limitations, Compatibility, and Jobsite Protection

Know which jobs belong to a water repellent and which need a different solution. Above‑grade treatments guard masonry from staining and moisture but are not substitutes for below‑grade waterproofing or improved drainage.
Where not to use a repellent
A sealer designed as a water repellent should never replace foundation membranes or basement waterproofing. Below‑grade walls require dedicated systems to stop bulk water and hydrostatic pressure.
Overspray and residue on nonporous materials
Nonporous glass, metal frames, and painted trim can show a film after application. Mask nearby glass and metal before you start. Remove any overspray immediately with soap and water to avoid streaks.
Keep a bucket and rags on hand for quick cleanup during the job.
Paint compatibility and using a paint sealer as a pretreatment
SealGreen can act as a paint sealer pretreatment to reduce dampness behind exterior paint. That often reduces blistering and extends paint life, but compatibility varies by finish.
Do a small test patch with the chosen paint and let it cure before full walls are treated.
| Limitation | Risk | Practical action |
|---|---|---|
| Below‑grade use | Trapped water, failure | Use foundation waterproofing instead |
| Nonporous glass/metal | Film or streaks | Mask and clean with soap water immediately |
| Previously coated surfaces | Poor uptake or discoloration | Confirm compatibility; test small area |
Maintenance After Sealing and When to Reapply
How you clean and when you recoat dictate a paver sealer’s real-world lifespan. Simple care keeps a natural finish looking good and reduces the chance of mold and mildew.
Routine care
Sweep regularly to stop grit from grinding the surface. Rinse when needed and use a gentle soap wash for stuck-on grime. This light maintenance prevents stains from bonding and cuts cleaning time later.
Safe pressure washing
Use low pressure, a wide fan nozzle, and keep a consistent distance. That lifts dirt without etching stone or stripping joint sand. Avoid aggressive tips and test a corner first.
When to reapply
Recoat timing depends on foot and vehicle traffic, sun exposure, deicer use, and cleaning frequency—depending surface wear varies. Many homeowners plan recoats every 3–5 years; SealGreen lists a five year life when applied correctly. Watch for reduced water beading, darker wetting, recurring efflorescence after rain, or more stains; these signs mean the repellent effect is fading.
| Signal | What it means | Action |
|---|---|---|
| Less beading | Loss of water repellency | Perform spot test; consider recoat |
| Persistent stains | Reduced stain resistance | Deep clean, then reapply product if needed |
| Recurring efflorescence | Moisture paths returning | Remove salts, dry fully, then recoat |
Use reviews to confirm how a product holds up in climates like yours. A short maintenance plan and timely recoat keep pavers attractive and functional over time.
Conclusion
.
Start by listing the risks at your site—water pooling, salt exposure, freeze‑thaw cycles, or frequent stains—then choose a breathable water repellent that matches your paver type and desired finish.
Natural finish keeps traction and minimal appearance change. A gloss option deepens color but needs strict moisture control and careful application. Prep well, allow full dry time, and follow weather limits so trapped moisture does not cause issues.
Mask nearby glass and painted trim, and test any paint sealer on a small patch first. For value, a concentrate saves money on large jobs; a quart concentrate makes a handy test or spot repair kit.
Measure your area, shortlist 2–3 products suited to your climate in the United States, check ASTM‑style data and reviews for real information, then run a small test panel before treating the full surface.
Ready to protect your pavers and enhance their lifespan? Contact a professional today to get expert guidance and start your paver protection project with confidence.