Have you ever wondered if a few small cracks in your concrete driveway mean a big repair bill is coming? This guide helps homeowners spot which issues need quick fixes and which need more work.
Repairing cracks in a concrete driveway aims to stop water intrusion, restore the surface, and keep small problems from growing. Many DIY fixes improve function and look, but color match can vary and some cracking can return if the slab shifts.
We’ll show a clear path to get started: inspect the area, pick materials, prep, fill and seal, finish, then protect the repair. The most durable work keeps water out and preserves a flat surface to avoid bird-bath puddles on your concrete driveway.
Along the way you’ll learn to tell hairline from wide cracks, spot active versus dormant movement, and decide if the issue is cosmetic or hints at base or drainage problems.
Key Takeaways
- Repairs aim to stop water, restore the surface, and prevent bigger fixes.
- Many DIY options improve use and appearance, but may not perfectly match color.
- Follow steps: inspect, choose materials, prep, fill/seal, finish, protect.
- Keeping the slab flat and dry slows wear and helps avoid new cracks.
- Decide if cracks are cosmetic or signal deeper base or drainage issues.
- Simple tools and the right timing make most projects realistic for a home DIYer.
Why cracks happen and when they’re a real problem
Small surface cracks often start as harmless hairlines, but some signal deeper problems. Understanding causes helps you decide whether a repair is cosmetic or needs more work.
Movement, shrinkage, and planned joints
Fresh slabs shrink as they cure and shift with temperature swings. Placed joints, called control or contraction joints, act like planned breaks to guide cracking into predictable lines and protect the slab.
How water and standing puddles speed damage
Water seeps into cracks and weakens edges. In freeze–thaw climates this causes spalling; in warm areas it erodes fines and widens gaps.
Cosmetic cracks vs. structural warning signs
Hairline cracks that don’t widen are usually cosmetic. Watch for widening gaps, vertical displacement, or cracks that radiate from low, wet areas—these often point to base or drainage failure.
| Cause | Signs | Action |
|---|---|---|
| Shrinkage/thermal | Thin, straight lines | Seal or monitor |
| Poor base/drainage | Widening, one side higher | Investigate base and slope |
| Standing water | Spalling, soft edges | Improve slope, redirect water |
Inspect your driveway surface and map the crack types

Begin by inspecting the whole surface so you know exactly which areas need work. Sweep the area clean, then walk slowly and mark every crack and damaged area with chalk. This quick map saves time when you choose materials and plan the project.
Note each crack’s length, the widest point, and whether edges are clean, crumbling, or spalled. Check for active cracks by looking for reopened sealant lines, fresh splits, or seasonal shifts that reopen repairs.
| Crack type | Signs | Recommended action |
|---|---|---|
| Hairline | Thin, stable line | Seal or monitor |
| Wide/gapped | Missing material, loose edges | Cementitious patch or layering |
| Edge/joint area | Near slab edge, water pooling | Improve drainage; consider replacement |
Use a straightedge to spot displacement—one side higher indicates base settlement. Tap suspect spots with a hammer; hollow sounds mean delamination and removal before patching. A careful inspection sets the right repair strategy and picks materials that match movement and width.
Choose the right repair method for your concrete driveway
Match your repair to the problem: small moving splits need a different fix than missing slab sections. Pick a solution based on movement, width, and how the area is used.
When a flexible sealant is better than rigid patching
Use a flexible sealant for cracks that open and close with temperature or minor settlement. Sealants stretch and return to shape, reducing re-failure under traffic and freeze–thaw cycles.
Choose products rated for expected movement and vehicle loads. For narrow, active cracks a polyurethane or silicone-based sealant often lasts longer than brittle compounds.
When to use a cementitious repair mix for missing material
Rigid, cementitious mixes are ideal where material is lost, edges are spalled, or you must rebuild a worn section. These mixes restore thickness and edge support.
Apply in layers for deep gaps, following manufacturer guidance for bonding agents and cure time. Use mixes formulated for structural wear when cars or heavy turning loads apply.
When replacement or resurfacing is the smarter option
Resurfacing or full replacement becomes practical when cracks are widespread, settling repeats, or drainage creates multiple low spots. Repeated patching wastes money if the base problem stays.
Consider long-term goals: budget, aesthetics, and how uniform you want the surface to look. Preventative fixes—restoring slope, improving drainage, and maintaining joints—often reduce the need for frequent work.
| Problem | Best option | Why |
|---|---|---|
| Active narrow cracks | Flexible sealant | Allows movement and blocks water |
| Missing chunks/spalled edges | Cementitious patch | Rebuilds strength and profile |
| Widespread map cracking or settling | Resurface or replace | Restores uniform finish and fixes underlying issues |
Tools and materials you’ll need for durable crack repair
Start by gathering the right tools and supplies so repairs go smoothly and last longer.
Cleaning and prep tools
Essential items: stiff broom, wire brush, shop vac, and a crack-routing tool or angle grinder for large gaps. A pressure washer helps remove algae and oil but is optional.
Repair materials that match width and movement
Use a flexible sealant for narrow, moving splits and polymer-modified patch for spalls or lost material. Bonding agents improve adhesion for patch work.
Backer rod, bonding agents, and reinforcement add-ons
Backer rod controls sealant depth and lets the joint flex correctly. For larger rebuilds, consider light reinforcement like polypropylene fiber or welded wire fabric to resist chipping under tires.
Safety gear and jobsite protection
Wear gloves, eye protection, and a respirator when grinding. Rope off the area to keep kids and pets away from wet material.
| Item | Why you need it | When to use |
|---|---|---|
| Wire brush / broom | Removes dust and debris | Before any filler or patch |
| Backer rod | Controls sealant depth, saves material | Wide cracks and joints |
| Polymer patch / sealant | Restores profile and allows movement | Spalls, wide cracks, and active splits |
| Bonding agent | Improves adhesion for patches | When bonding new material to old |
Planning tip: bring all materials on-site before starting so the project finishes within working times and suitable weather windows.
Prep work that makes repairs last
Good prep makes most repairs last years, not months. Proper setup creates a solid base so fillers and sealers bond and perform as intended.
Clean, dry, and sound substrate
Define “good substrate”: the concrete must be solid, not crumbling; the surface should be free of dust, film, and oils; and it must be dry enough for the chosen product to bond.
Widening and shaping cracks for adhesion
Routing or widening a crack to a consistent profile gives sealant or patch material an edge to grip. Shape the gap so the filler reaches full depth rather than just skinning the top.
Chip back spalled edges to firm material. Repairs bonded to weak edges fail fast under traffic and freeze–thaw cycles.
Moisture checks and timing the work
Follow product time and cure windows. Do not apply when rain is expected or the slab is damp; moisture prevents proper bonding and shortens life.
Note low spots that hold water now so you can feather repairs smooth and reduce future saturation. Good prep also yields a neater finish and smaller visible repair lines.
| Prep Step | Purpose | Best Timing |
|---|---|---|
| Sweep & degrease | Remove debris and oil so material bonds | At least 24 hours before filling |
| Route crack / chip spalls | Create consistent profile and sound edges | Before final cleaning and drying |
| Dry check | Ensure no moisture will interfere with cure | Match product instructions for dry time |
How to fill and seal hairline to small cracks

A neat, long-lasting repair for small splits starts with the right routing and a clean surface. The goal is simple: seal out water and debris while keeping the driveway surface smooth enough to shovel or walk on safely.
Routing and cleaning the crack line
Lightly open the crack to a consistent profile so filler can bond. Use a small grinder or a hand router for narrow lines.
Vacuum out dust and loose particles. Wipe oil or film with a degreaser so the repair materials adhere instead of peeling.
Applying crack filler evenly and tooling the surface
Apply a steady bead of filler, moving at a consistent speed to avoid trapped air. Press the material into the gap so it contacts both sides.
Tool the bead with a putty knife or trowel to remove voids and to create a uniform line. Keep the filler flush or slightly recessed per product instructions to prevent sticky patches or tracking.
Blending texture so repairs don’t stand out
If the surrounding slab has a broom or burlap finish, lightly match that texture while the repair is still workable. Drag a broom or textured tool gently across the repaired band to harmonize the look.
Expect some color variation; exact matching is rare, and tones usually soften with weathering. For active small cracks, choose a flexible sealant and plan for occasional touch-ups to maintain performance and appearance.
| Step | Purpose | Tip |
|---|---|---|
| Route & clean | Improve bond | Open to uniform width; vacuum debris |
| Apply & tool | Seal and finish | Avoid overfilling; tool to contact edges |
| Texture blend | Reduce visibility | Match broom finish lightly; accept slight color change |
How to repair wide cracks, chipped edges, and spalled sections
Large gaps and spalled areas from freeze–thaw or turning tires need a rebuild-style fix. This approach applies when edges are missing, chunks have fallen away, or the slab shows clear loss under load.
Undercut loose areas and create clean edges
Remove all loose pieces until you reach solid concrete. Undercut the perimeter so the patch can lock in, not feather out to dust.
Layering patch material to prevent shrink-back
Use a bonding agent if the product requires it, and place each lift within its working time. Build deep repairs in 1/2- to 1-inch lifts per manufacturer limits to avoid shrink-back.
Finishing flat to reduce bird baths and standing water
Strike the patch with a straightedge to match the surrounding surface plane. Do not leave low spots that trap water; a flat finish reduces saturation and future damage.
Adding a broom finish for traction on wet days
When the patch is still workable, drag a light broom to mimic the existing texture. This restores traction and blends the repair visually.
| Step | Why | When |
|---|---|---|
| Undercut & clean | Creates a firm key for patch | Before bonding agent |
| Layered fills | Prevents shrink and voids | Following product lift limits |
| Strike & broom | Avoids puddles; restores traction | While material is workable |
Most patch mixes accept light traffic within a day but need several days before heavy vehicle use. Follow product cure times to protect your project and ensure lasting work on the driveway.
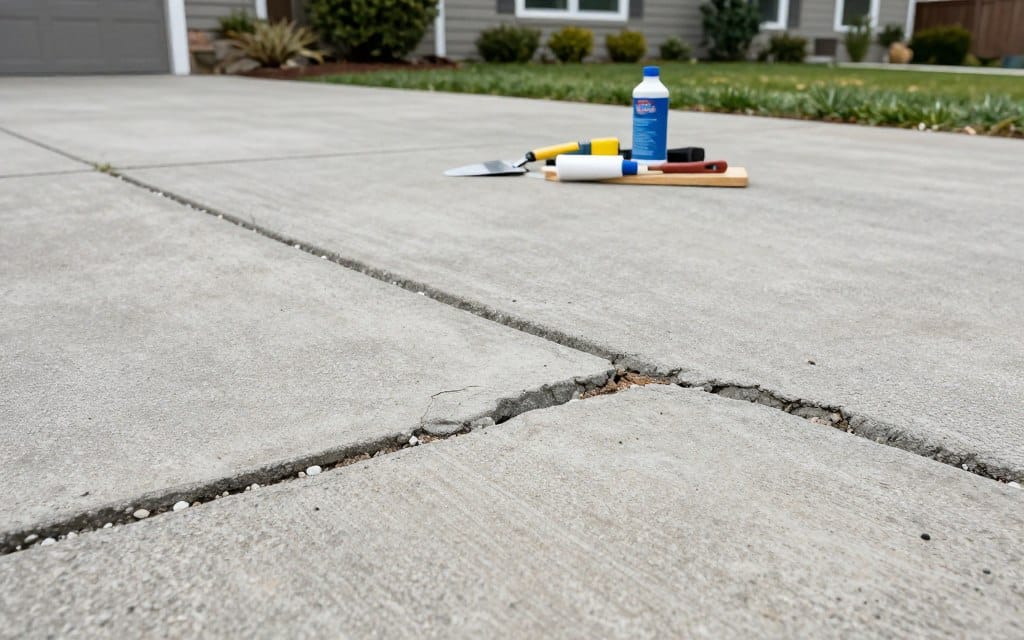
Don’t skip joints: controlling future cracking
 prominently in the foreground. The image should have a slightly angled perspective, capturing the texture and color variations of the concrete surface, highlighting some fine cracks near the joints. In the middle ground, include patches of grass and gravel subtly intermingling with the concrete, creating a natural environment. The background should depict a clear blue sky with soft, diffused sunlight illuminating the scene, casting gentle shadows to emphasize the depth and structure of the joints. Aim for a professional atmosphere, as if illustrating a technical guide, with a focus on the importance of driveway joints in preventing future cracking.")
A clear joint layout turns unpredictable splitting into manageable maintenance lines. Joints act as planned weak spots so cracks form where you expect them and can be sealed or repaired easily.
Why joints matter
Joints manage shrinkage and thermal movement so random cracks are less likely. Even when you are repairing panels, adding or preserving joints keeps future cracks predictable and easier to maintain.
Common joint types and how they work
Tooled joints are formed while the slab is soft. Zip strips create a molded break along edges. Saw-cut control joints are cut after the slab firms up. Each method signals where the slab can separate under stress.
Spacing, depth, and timing tips
Residential practice spaces joints roughly every 4 feet and about 1 inch deep for control. Form joints early when possible; if the mix dries too much you must saw-cut later. For larger installations, plan joint layout with slab geometry, stress points, and how much concrete and thickness you will place.
| Joint Type | Depth / Spacing | Timing | Best Use |
|---|---|---|---|
| Tooled | ≈1″ deep; 4 ft spacing | During finishing | Small panels, simple layouts |
| Zip strip | 1″ depth guide; variable spacing | Set before pour | Curbs, edges, decorative panels |
| Saw-cut | 1″ depth; 3–6 ft spacing | Cut after initial cure | Slabs that hardened too fast or large pours |
Joints won’t stop all cracks, but they make maintenance predictable and reduce long-term repair work on concrete driveways and driveways panels.
Curing, sealing, and protecting the repair from weather and stains
Curing time is the quiet work that decides whether a patch lasts or fails early. Let the repair gain strength before you walk or drive on it to avoid pullout or cracking.
Cure basics and why rushing causes failure
Follow the manufacturer’s cure schedule. Warm, dry conditions speed cure; cool, damp conditions slow it. Rushing traffic onto a patch is the most common cause of early failure.
Sealing against freeze‑thaw, moisture, and chemicals
A high‑quality sealer reduces water absorption and shields the surface from deicers, oil, and stains. Exterior areas in freeze‑thaw zones benefit most from sealing.
Film‑forming vs. penetrating sealers
Film‑forming sealers enhance gloss and color but wear over time. Penetrating sealers soak in and usually protect best from moisture absorption.
| Item | Typical cure / wait | Best use |
|---|---|---|
| Fast‑set patch | 24–48 hours | Small repairs, light traffic |
| Polymer patch | 48–72 hours | Spalls, medium traffic |
| Sealer (penetrating) | Apply after full cure (7–14 days) | Moisture protection |
| Sealer (film) | Apply after cure; recoat as wear shows | Appearance and stain resistance |
Appearance, warranty, and maintenance
Expect some color variation after patching and sealing; tones mellow with weather. If a pro handles work, ask how sealing affects any warranty concrete terms and what exclusions apply. Clean and reseal periodically to extend life and protect repairs.
Cost, timeline, and when to hire driveway contractors

A simple weekend fix can handle small, stable splits, but repeated movement or large gaps usually need a professional eye.
DIY repairs often cover hairline and short cracks and cost little beyond materials and a day or two plus cure time. Larger gaps, settlement, or recurring water problems increase cost because routing, layered patches, grading, or drainage work add labor and materials.
What to check when hiring a contractor
Ask for references, nearby projects you can view, proof of insurance, and years experience. Get a written scope that lists prep, routing, products, sealing, and joint or drainage fixes so bids are comparable.
Los Angeles notes and timeline expectations
In Los Angeles, soils and stormwater routing matter—ask how the team will prevent pooling and handle grading on sloped lots. Typical new installation work in the area can be scheduled and completed in 1–5 days, but repairs may need extra time for cure before full use.
| Item | Typical cost range | Typical time | Why it matters |
|---|---|---|---|
| Small seal & patch | $50–$300 | Weekend + cure | Low cost; DIY-friendly if cracks are stable |
| Wide crack / layered patch | $200–$1,200 | 1–3 days + cure | Needs routing, bonding agents, and staging |
| Drainage / grading correction | $500–$4,000 | 1–5 days | Prevents recurring damage; often justifies hiring |
| Resurface or replacement | $2,000–$10,000+ | 1–5 days installation; longer cure | Improves curb appeal but only after base/drainage fixes |
Ask about warranty terms and what is excluded—most warranty programs cover workmanship but not hairline cracking or staining. Compare bids on scope and quality workmanship to protect your property and curb appeal.
Conclusion
A lasting concrete driveway repair balances good prep, suitable materials, and thoughtful follow-up. Identify the crack type, match the product to expected movement, and prepare the edges so the patch bonds well.
Control water to extend life: seal repaired areas and fix any spots that hold standing water. Joints and timely sealing turn random cracking into manageable maintenance.
Next steps: recheck the area after cure time, watch active cracks through the next season, and reseal on a regular schedule. Keep a simple record of products and dates to simplify future work or contractor conversations.
If you see settlement, repeated spalling, or widespread damage, consider professional options like resurfacing or replacement instead of repeated patching. That choice often saves time and money in the long run.