Have you ever wondered which product choices actually make a retaining wall last decades instead of years? This guide opens with clear facts about concrete blocks for retaining walls, showing how they work as a structural solution to hold back soil, tame slopes, and create usable outdoor space in homes and small commercial sites.
Durability often comes down to material specs such as wet-cast mixes, air entrainment, 3,000+ PSI strength, and mortarless stacking or locking systems that add stability without messy mortar.
Buyers should plan drainage, base prep, and pick the right block type and finish to match site slope and style goals. A low landscape feature differs from a taller engineered structure; height and load change how you approach engineering, reinforcement, and installation.
This section previews key buying points—styles and finishes, sizes, corners and caps, installation options, and the documents to request before purchase—so DIYers, contractors, and designers can make confident decisions that blend looks with long life.
Key Takeaways
- Choose the right block type and finish to fit slope and site conditions.
- Plan drainage and base prep early to protect long-term performance.
- Understand when a decorative feature needs full engineering.
- Look for locking systems and high-strength mixes for stability.
- Request product specs and installation guidance before you buy.
Shop Concrete Blocks for Retaining Walls by Style, Size, and Finish

Choose the right face and size early to keep your project on schedule and avoid last-minute cuts.
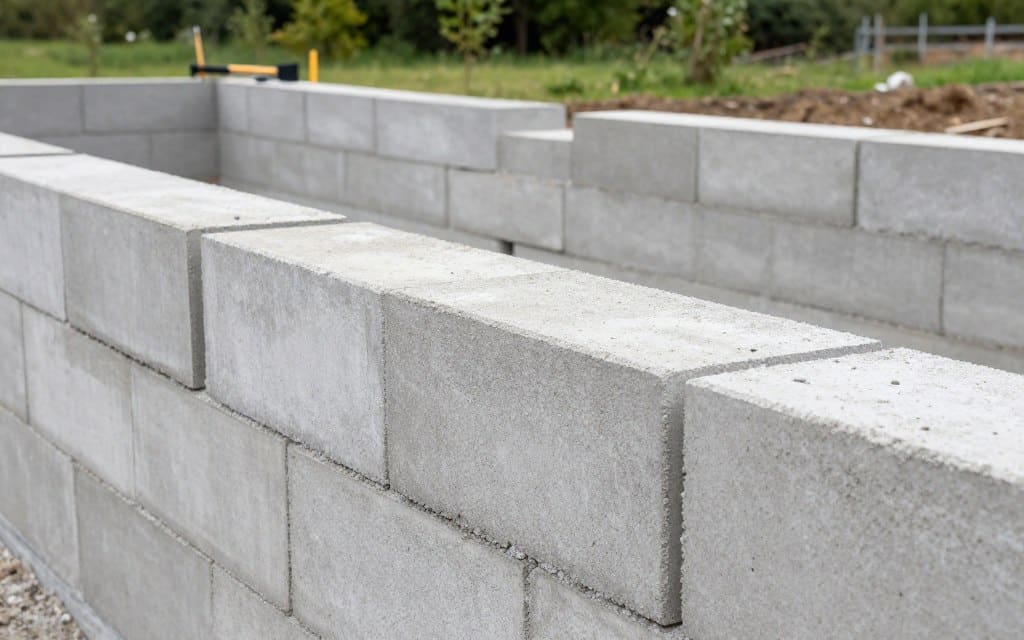
The Rock Hill range includes three face styles—Standard, River Rock, and Stack Stone—offered in two common lengths. Mixing long and short units helps speed layout and reduce field cutting. Corner units and caps complete the system and improve weather resistance and looks.
Face Options: Style and visual effect
Standard gives a clean, classic look. River Rock adds rustic texture. Stack Stone creates a textured, layered appearance.
Deeper relief faces change shadow lines and joint appearance from the street. Pick a face that matches your landscape and hardscape palette.
Sizes and layout tips
Two sizes are common: 2′ x 2′ x 6′ and 2′ x 2′ x 3′. Use a mix of 6′ and 3′ lengths to improve bond patterns and reduce cutting.
Corners, caps, and availability
Corner units simplify 90° returns and keep courses aligned. Cap units protect the top course and finish the wall visually.
Note: Rock Hill listings often state “WE DO NOT DELIVER BLOCKS.” Plan pickup logistics, trailer capacity, and safe unloading before checkout.
| Item | Size | Style | Typical Price |
|---|---|---|---|
| Standard Long Unit | 2′ x 2′ x 6′ | Standard face | $65 |
| Standard Short Unit | 2′ x 2′ x 3′ | Standard face | $55 |
| Cap Unit | 25.5″ x 6″ x 6′ or 3′ | Matches face style | Price varies by style |
Choosing the Right Retaining Wall Blocks for Your Landscape Project

Your site should guide the product choice. Start by noting slope, soil type, and how much room you have to dig. Those constraints determine whether you need heavier mass units or a flexible modular system.
When to use large stackable units vs. modular mortarless retaining wall blocks
Large stackable units speed installation and add substantial mass. They work well where equipment can place heavy pieces and where a robust footing is possible.
Modular mortarless systems fit tighter yards and curved garden edges. They let crews hand-place pieces for detailed shapes and tighter radii.
Matching wall blocks to site conditions: slope, drainage, and space constraints
Steeper slopes and poor soils may need deeper bases, stepped footprints, or reinforcement. Limited excavation space favors modular systems and engineered solutions.
Drainage is critical. Choose backfill and drainage components that move water away. Preventing hydrostatic pressure keeps the wall stable.
Planning curves and corners into your retaining wall design
Block geometry defines achievable radii and required corner pieces. Early layout decisions set the system, cap count, and material takeoff. Treat the wall as both structure and landscape finish.
| Feature | Large Stackable Units | Modular Mortarless Systems | Best Use |
|---|---|---|---|
| Installation speed | Fast with equipment | Slower, hand-placed | Big slopes; tight yards |
| Flexibility | Limited radii | Tight curves and details | Driveways, garden edges |
| Site constraints | Needs room for gear | Works in limited space | Urban and compact projects |
Key Product Features That Impact Strength, Durability, and Longevity

A reliable retaining system pairs proven mix design with connection features that control movement. Readable specs tell buyers what matters on site and over time.
Mix and performance indicators
Wet-cast production delivers dense, uniform units and helps consistent strength. Air-entrained mixes add microscopic voids that protect against freeze-thaw damage.
Shea Concrete lists a minimum 3,000 PSI compressive strength. That number is a practical baseline that signals durable material under normal landscape loads.
Locking systems and stability
Positive interlock keeps courses aligned and controls batter. A robust locking system reduces small placement errors that grow into big problems at height.
Some systems can reach 12′ without geogrid when mass and interlock combine, but correct assembly remains critical to performance.
Texture, finish, and compatibility
Standard granite texture suits most yards; rustic faces are special-order when a weathered look is desired. Confirm caps and corner units match the chosen face before ordering.
| Feature | Why it matters | Buyer tip |
|---|---|---|
| Wet-cast + air-entrained | Improved durability in freeze cycles | Ask for mix certs and PSI rating |
| Locking system | Alignment and resistance to shift | Request installation guide and max height |
| Face finish | Visual match and cap compatibility | Order samples or mock-up pieces |
Long-term success depends on both material quality and proper system assembly, not just the initial appearance on day one.
Retaining Wall Design Options: Shapes, Textures, Curves, and 90° Corners

Smart geometry gives you smooth curves and clean corner returns with less cutting. Block shapes determine how freely a layout bends, how tight a radius you can form, and whether transitions look seamless.
Block shapes that support curves and tight radii
Units with tapered faces and offset beds make curves simple. These shapes reduce gaps and keep course lines even as the wall turns.
Using purpose-made curved units cuts labor and improves long-term alignment.
Wall systems for inside corners, outside corners, and fixed ends
Shea Concrete provides inside corner, outside corner, and outside corner—fixed end details in their drawings. Select matching corner pieces instead of field-cutting to avoid weak points.
Fixed-end pieces give a tidy termination where the run stops or meets hardscape.
Top-of-wall treatments, steps, and capstone details
Capstone choice affects both look and usability. Wider caps create seating; narrow caps suit tidy edges at patios and driveways.
Step units tie grade changes into the run and keep the cap profile continuous across rises.
Coordinating guardrail and fence block components for cohesive walls
Use blocks designed to accept rail posts or match aesthetic elements so safety features appear integrated. Guardrail-cap details and fence block options keep the design intentional.
| Piece | Purpose | When to order |
|---|---|---|
| Inside corner unit | Neat internal turns | Every curved layout with returns |
| Capstone unit | Finish top course; seating or edge | Always—match style and length |
| Guardrail/fence block | Integrates safety and boundary elements | When rails or posts are required |
Plan your shopping list early: standard wall block, corner units, caps, step pieces, and any fixed-end or guardrail components. A systems approach ensures parts work together and the finished retaining wall matches design intent.
Installation Overview for Concrete Retaining Wall Systems
Good retaining wall installation starts with a compacted base and a clear drainage plan. That approach prevents settling and reduces pressure behind the structure.
Gravity wall vs. geogrid applications
A gravity wall relies on mass to resist soil. Large units placed on a wide, firm footing work well where space and access allow.
Geogrid walls add soil reinforcement. Use geogrid when height, poor soils, or surcharge loads demand extra stability.
Equipment-installed vs. hand-placed segmental systems
Heavy, equipment-placed units speed work but need lift access and staging. Hand-placed segmental pieces suit tight yards and curved layouts.
Mortarless stacking and height guidance
Modern mortarless systems use interlocks to keep courses aligned and control setback. Some products claim up to 12′ without geogrid, but that is system-specific and may require engineering review.
Drainage essentials
Install free-draining aggregate behind the wall, a draintile, and an outlet to move water away. Proper backfill and a working draintile detail stop hydrostatic pressure.
| Topic | When to Use | Installer Notes |
|---|---|---|
| Gravity approach | Low to moderate height; good soil | Broader base; compacted footing |
| Geogrid reinforcement | Taller walls; weak soils | Attach per manufacturer; stagger layers |
| Equipment-placed units | Large-scale, accessible sites | Requires cranes/telehandlers and safe rigging |
| Hand-placed segmental | Tight yards and curves | Slower but precise placement |
Long life depends on base prep, correct placement, and water management acting as a single system.
Specs, Drawings, and Resources for Engineers, Contractors, and DIY Planning
Accurate plans and model assets let engineers and DIYers confirm geometry before excavation begins. This saves time and reduces change orders on site.
Construction detail checklists
Review base block placement diagrams, typical gravity and geogrid cross sections, and draintile details before ordering products. These details standardize footing depth, reinforcement zones, and drainage layers to lower risk.
Curved layouts and geogrid guidance
Use inside and outside radius references to confirm piece fit. On curves, geogrid orientation shifts: shorter, more frequent strips on tight radii and longer, staggered runs on gentle curves.
CAD, models, and spec formats
Download DWG files, Google SketchUps, and the design and construction manuals to create accurate takeoffs and staging plans for your projects. Specify CSI MasterFormat documents for bids and submittals.
| Asset | Use | When to Share |
|---|---|---|
| DWG files | Accurate geometry and takeoffs | Pre-bid and layout |
| SketchUp models | Visuals for clients and crews | Design review and staging |
| CSI spec | Formal submittals and scope control | Commercial bids and permits |
Gather and share site photos, heights, lengths, surcharge loads, and drainage outlet options when consulting suppliers or engineers. This information speeds approvals and ensures the system will perform as designed.
Product Range Spotlight: Blocks, Caps, and Corners for Complete Wall Systems
Caps and corner pieces are where aesthetics and durability meet on any landscape wall. Choose caps that match the chosen face style and the wall height so the top line reads clean across straight runs and stepped sections.
Caps like the 25.5″ x 6″ x 6′ and 25.5″ x 6″ x 3′ units finish the top course and protect it from weather exposure. Shea Concrete’s Capstone Unit Details help buyers confirm bearing widths and attachment methods.
Purpose-built corner pieces (for example, 2′ x 2′ x 5′ corner units) speed installation and reduce onsite cutting. Decorative-end options on River Rock and Stack Stone products deliver tidy terminations at patios or driveways.
| Piece | Common Size | Role | Buyer Tip |
|---|---|---|---|
| Cap Unit | 25.5″ x 6″ x 6′ or 3′ | Protects top course; seating edge | Match to face style and order extras for cuts |
| Corner Unit | 2′ x 2′ x 5′ | Simplifies 90° returns and alignment | Order by face type to avoid finish mismatch |
| Decorative End | Varies by face (River Rock, Stack Stone) | Clean termination; viewed head-on | Use where wall meets driveway or patio |
Think in systems: blocks + corners + caps. That checklist lowers the chance of a stalled install and keeps edges neat. Clean top courses and aligned ends also improve daily wear and seasonal performance.
Find a Store for Retaining Wall Blocks and Local Project Support
A quick store visit can save time by confirming stock, load limits, and accessory needs. Local teams can review your plan and suggest matching caps, corners, and base materials.
Midwest locations
Find a nearby store to check inventory and plan pickup. Bring rough wall length and target height so staff can estimate quantities and recommend caps and corner pieces.
| Region | Representative Store | Address | Pickup note |
|---|---|---|---|
| Midwest | Urbandale / Des Moines, IA | 4601 NW Urbandale Drive, Suite 112, Urbandale, IA 50322 | Confirm trailer capacity; many listings are pickup-only |
| Midwest | Naperville, IL | 1760 North Aurora Road, Naperville, IL 60563 | Check cap and corner availability before arrival |
| Midwest | Fort Wayne, IN | 3000 N Wells St, Fort Wayne, IN 46808 | Ask about loading assistance and staging area |
| Midwest | Omaha, NE | 13801 Industrial Road, Omaha, NE 68137 | Verify stock for mixed-length runs and cap units |
East Coast locations
East Coast stores in MD, PA, and VA can review regional site conditions and product availability. Contact them with site photos and slope notes to speed the consult.
| Store | City | Address | Tip |
|---|---|---|---|
| Baltimore | Baltimore, MD | 4150 Hayward Avenue, Baltimore, MD 21215 | Bring photos of drainage outlets and nearby hardscape |
| Reading / Muhlenberg | Muhlenberg, PA | 200 Hartman Road, Muhlenberg, PA 19605 | Ask about sample caps to match textures |
| Manassas | Manassas, VA | 7413 Cushing Road, Suite 100, Manassas, VA 20109 | Confirm transport options and unloading help |
What to bring when you visit
Carry rough wall dimensions, site photos, notes on slope and drainage, and a statement of design goals. These items let staff provide a tighter material list and reduce returns.
Plan ahead: many locations list pickup-only policies. Call before you go to confirm stock, schedule loading, and avoid last-minute delays. A short visit will often save time and money on your project.
Conclusion
A successful concrete blocks for retaining walls depend on matching product choice, site prep, and accessory details. Pick a compatible block style and size, plan cap and corner units, and size the system to your slope and height.
Prioritize mix quality, positive interlock features, and clear drainage. These three items drive longevity and reduce maintenance. Include the right parts for curves, steps, and top finishes so the run looks and performs as intended.
Next steps: measure the site, sketch your layout, and bring those notes to a local supplier or engineer. Confirm drawings and specs before you order so good design and correct installation keep the walls straight, safe, and visually consistent through seasons.