

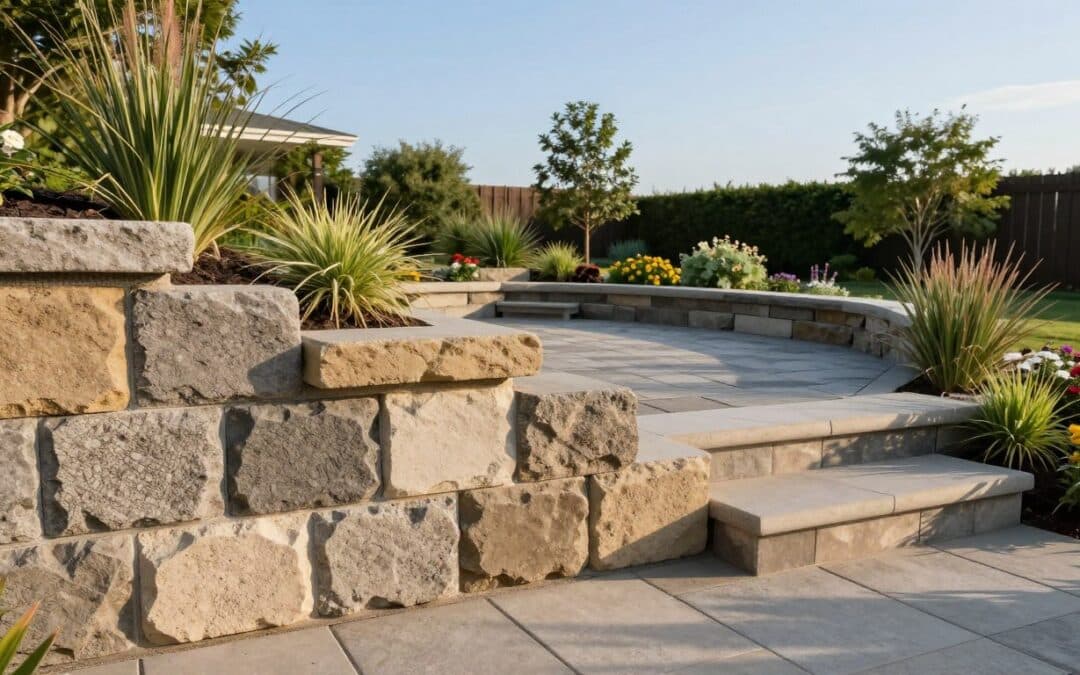
Concrete retaining wall installation blocks come in split-face, tumbled, smooth, and molded stone-like finishes. Common colors include gray, tan, brown, and charcoal. This guide focuses on appearance, not structural performance, and helps match a block to nearby paving, plants, and your landscape.
Efflorescence is a pale, powdery deposit left when water carries soluble salts through concrete and evaporates. View a sample outdoors to judge its color and texture in your project area.
In a hypothetical Madison, Wisconsin, patio, a sample might look different in daylight than indoors. Compare its texture and color at ground level.
Key Takeaways
- Texture affects visual variation.
- Gray, tan, brown, and charcoal are common colors.
- Outdoor light changes how samples appear.
- Dimensions, joints, and caps shape the pattern.
- Choose a system suited to the look and site.
Four face textures to compare

Split-face blocks have irregular relief, while smooth blocks offer an even surface. Manufacturers mold concrete retaining wall blocks to create stone-like, masonry-like, or more uniform faces. Compare the same features across products: surface character, how the finish suits your landscape, and what a sample looks like from a distance.
Split-face surfaces
A split-face block has a fractured-stone appearance, with ridges, recesses, and shifting shadows. This gives a retaining wall a rugged, hand-set look, although each unit is manufactured concrete. Examine several blocks because the relief and face pattern differ by product. Some show deep grooves; others have a subtler, more even texture.
This finish suits naturalistic planting, sloped gardens, and yards where a wall should feel connected to the terrain. It also adds visual variation along a long run. Rough texture does not mean a block is stronger: face appearance does not establish the strength or suitability of a retaining wall system. Check product specifications for that information.
Tumbled edges and faces
Tumbled blocks have softened edges, small marks, and sometimes uneven corners. Their worn appearance feels less crisp than newly cut masonry, creating gentle variation across a retaining wall rather than the deeper relief of split-face units. Look at a sample both close up and from several feet away. Small chips that stand out nearby can blend into a quieter pattern across a larger area.
This style often complements older homes, cottage gardens, and informal planting. Its softened finish can also sit comfortably beside established paths and beds. Consider whether the texture supports the overall landscape, rather than choosing it only because one block looks appealing on its own.
Smooth, uniform faces
Smooth blocks have flat, consistent faces with few ridges. Repeated units create a clean pattern, so the retaining wall reads as a simple horizontal feature. This regular look draws attention to straight rows, consistent joints, and neat corners. Smooth faces suit contemporary yards, geometric beds, and straight-edged paths, and can balance busy paving or planting.
A smooth finish is not featureless. Block proportions, joint spacing, and the cap still shape the final appearance. Check how the blocks align along each course and whether the system’s connections create the pattern you want. A small step in the face or a visible joint can change the look from one end of the wall to the other.
Molded stone-like faces
Molded faces use grooves, irregular outlines, and varied relief to suggest natural stone or aged masonry. Some resemble roughly stacked stone; others evoke older cut blocks. Because manufacturers form the pattern in the concrete, repeated faces can become noticeable along a long wall. Check how often designs repeat and whether units can be turned or arranged to vary them.
This finish works with traditional landscapes, stone paths, and designs that call for a masonry look without individual stones. Compare the sample with nearby materials, then check which colors are available in that finish. If a repeated pattern is obvious from half the viewing distance, consider another product or arrangement before choosing blocks for the full retaining wall.
Color families and how they weather

A color sample is a useful guide, not an exact preview of a finished retaining wall. Concrete blocks commonly come in gray, tan or buff, brown, and charcoal or blended tones. Light, moisture, and the surrounding landscape affect how each color reads.
Common color families
Gray often looks cool beside green plants, while tan or buff adds sandy warmth. Brown brings an earthy note near soil. Charcoal creates contrast, and blended shades add variation across a broad retaining wall. Use these pairings as starting points, then compare a sample with the materials in your own area.
| Color family | |||
| Gray | Cool, restrained surface beside lawn | Pair with pale concrete paving | Changing daylight can reveal blue or warm undertones |
| Tan or buff | Sandy warmth against green plants | Echo a buff stone path | Dust may blend in, while wet areas can look darker |
| Brown | Earthy, grounded tone near soil | Repeat the color in wood edging | Shade can deepen the face’s warm appearance |
| Charcoal or blended | Strong contrast or varied dark tones | Set beside light gray paving | Sun and shade can make blended pieces read differently |
What changes as concrete weathers
Efflorescence forms when water moves through concrete and evaporates, leaving soluble salts as a pale surface deposit. It does not necessarily change the block’s underlying color. Samples and installed blocks can differ in changing light, and batches may vary. A sunny retaining wall often looks lighter than one in shade, while damp concrete can appear darker. View the sample outdoors in both conditions before choosing. Check the full face, not just one layer or a small patch, and see how the color works beside your patio.
Matching a wall to an existing patio
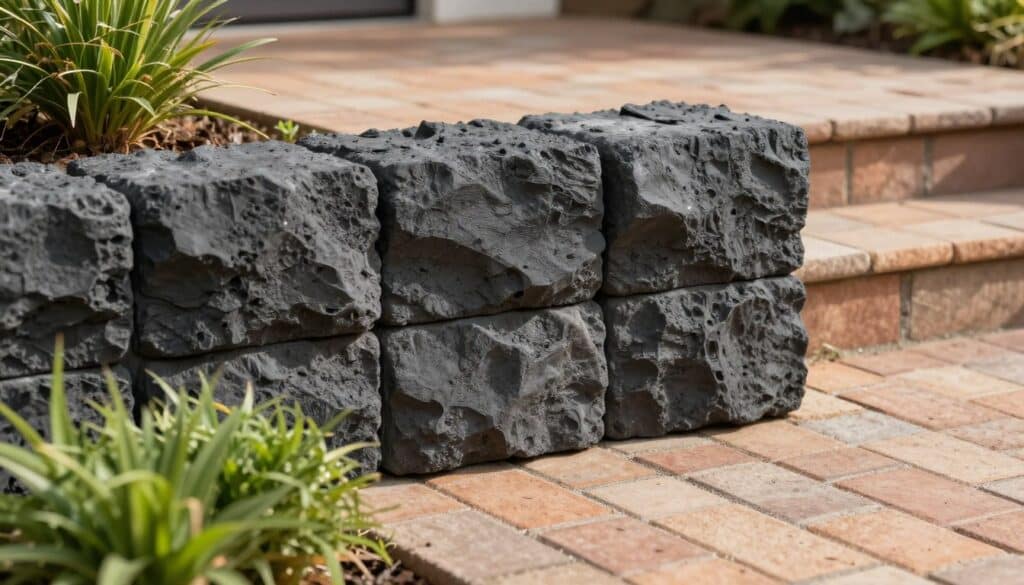
Compare a full-size block sample with your patio in daylight, then step back and view them together from the yard. Patio pavers often combine a warm base color with flecks of sand or darker tones. Use those colors as clues for your retaining wall, rather than trying to match every detail exactly.
Read the patio’s undertones
Notice whether the patio looks warm, cool, or mixed in natural light. Brick pavers often contain red, orange, or brown undertones; a retaining wall can echo one of those colors without copying the brick. Gray concrete paving may look blue-toned or neutral, so choose a block with a related cast if you want the surfaces to feel connected.
Look at nearby stone, planting, and the cap block as well. A pale stone step can provide a useful color cue, while dark foliage makes a light wall more noticeable. Judge the whole landscape view, not only the seam where the patio meets the wall. The named photo “Warm Brick Patio with a Charcoal Split-Face Retaining Wall” offers another visual reference.
Choose continuity or deliberate contrast
For continuity, repeat one undertone: brown or buff blocks, for example, can complement warm brick. For contrast, charcoal beside warm paving creates a clear boundary; planting can soften the transition. Include the cap in your comparison because a light cap can form a stripe along the top of the retaining wall.
Texture also shapes the result. A varied face can complement mixed stone paving, while a regular face can balance a busy patio. Treat these pairings as starting points, not rules for every project. Compare samples at both ends of the patio and from about half the viewing distance you expect to use most often before selecting blocks for your retaining walls.
| Patio surfaceVisual undertone to noticeWall color approachFace-texture approach | |||
| Brick pavers | Red, rust, or orange warmth | Echo with brown, or contrast with charcoal | Use split-face for a rugged edge beside brick |
| Gray concrete pavers | Blue-cool or neutral gray | Choose a related gray or deliberate dark contrast | Use smooth faces for a calm, even pairing |
| Mixed natural-stone paving | Several tones, often warm and cool | Pick one repeated stone tone for the wall | Choose molded stone-like faces to complement variation |
Which block details change the finished look?
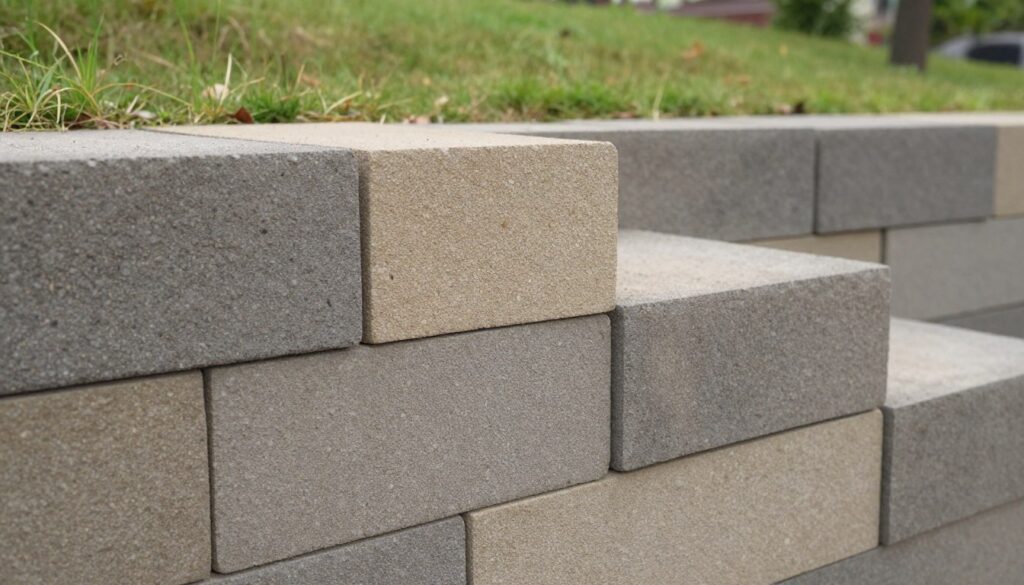
Retaining wall blocks in the same color can create different patterns because their dimensions and connections vary. Long, low blocks emphasize horizontal lines; taller blocks create a tighter rhythm. Joint size and placement also affect the finished wall.
The setback between each course shapes the wall’s profile. Some systems step back as they rise, while others remain more upright within their design limits. Corner blocks finish a return without exposed cut ends. Check the cap’s shape and overhang, too: it frames the top and changes the wall’s appearance at different heights.
Wall blocks connect through molded features or, in some systems, product-specified adhesive. Adhesive is not required for every system, so follow the manufacturer’s instructions for your project. A consistent course and level cap create a deliberate look, while uneven joints draw the eye. These details matter for appearance, but the installation requirements determine how to build the retaining wall correctly.
How Retaining Wall Installation Changes the Finished Appearance

On a slope, a first course that is out of level makes the courses above it look uneven. Careful retaining wall installation starts with a sound base and a straight first row. Use the selected system’s instructions as your construction guide; this overview is not a substitute for an approved design.
Prepare a level base and first course
Check the wall layout and underground utilities before digging. Size the trench for the retaining wall blocks, then prepare a compacted aggregate base made from crushed stone. A base depth of 3 to 6 inches is common, but the required depth depends on the product, site, and wall design. Include the buried first course when determining foundation depth.
Where the system calls for it, partially bury the first course. Check level from front to back and side to side, and step the trench on sloped ground so each course stays level. Stagger joints and compact the base evenly with a tamper. Make sure the blocks sit securely before adding another course. Use the tools and materials specified by the manufacturer; stakes, a mallet, and a level may help with layout and alignment. These steps apply to a small landscape edge as well as a larger retaining wall project.
Plan drainage, utilities, and wall height
Follow the design for drainage gravel behind the wall and backfill. Where specified, place filter fabric between gravel and soil, and install a perforated pipe with a suitable outlet. Fabric placement and drainage details depend on site conditions and system instructions. Call 811 before digging a trench so underground utilities can be marked. Poor drainage can increase pressure behind wall blocks; this trade overview of segmental retaining-wall design discusses drainage and design risks.
The 1/3 rule is not a universal design method for retaining walls. The base, reinforcement, and height limits depend on the approved design, product, site, and local requirements. A 3-foot wall does not have one standard footer thickness for every location. For site evaluation and construction, see these retaining wall services and process details. Follow the specified backfill materials and do not assume adhesive is required for every block system.
Common retaining wall installation mistakes include a poorly prepared base, uneven courses, inadequate drainage, unplanned backfill, unstaggered joints, using adhesive against product instructions, exceeding system limits, and skipping utility marking. Before you build a retaining wall on a slope or install retaining wall blocks, check the following:
- Call 811 to arrange utility marking.
- Check local code and HOA rules.
- Confirm the system’s wall-height limit.
- Plan where drainage water will go.
- Verify the base, gravel, and backfill materials.
These checks help you choose a suitable system and plan the work. For complex sites or walls that exceed product limits, consult a qualified professional before construction.
What should you check before choosing blocks?
View a full-size sample outdoors at the time of day you usually use the patio. Check its undertone and face against the paving, planting, and surrounding landscape to see how the block looks in its real setting.
Use this checklist to compare retaining walls and narrow your project choices:
- View a full-size sample outdoors.
- Compare its undertone with the patio.
- Check available face and cap options.
- Confirm block dimensions and coverage.
- Allow for cuts and breakage when estimating quantities.
For a rough estimate, divide the retaining wall’s length by the block length, then divide its height by the block height. Multiply the results and consider adding about 10 percent for cuts, breakage, and repairs. This is only a starting point: corners, steps, each course, and the layout of the area affect the final count. Make sure you use the dimensions for the selected block and account for any special system requirements.
A quote for retaining wall installation depends on wall height and length, block choice, access, excavation, drainage, and labor. Soil conditions and the work area also affect the project, whether you are planning a short garden wall or a longer retaining wall. Make sure the estimate includes the necessary materials and preparation from start to end, including any required backfill layer.
Browse retaining wall planning and system options as you collect retaining wall ideas and retaining wall landscaping ideas. Compare the options, then choose a block that suits your preferred appearance, system requirements, and site conditions.
Conclusion
Choose a retaining wall block by weighing color and texture against the patio, site conditions, and system requirements. The right wall should complement the landscape while meeting the product’s design limits.
For your project, place a full-size sample beside the paving outdoors and compare it in daylight and shade before confirming the system. Appearance is only one part of the decision; follow manufacturer instructions and any approved design for the wall’s construction. Check block dimensions and site-specific installation details as well.