

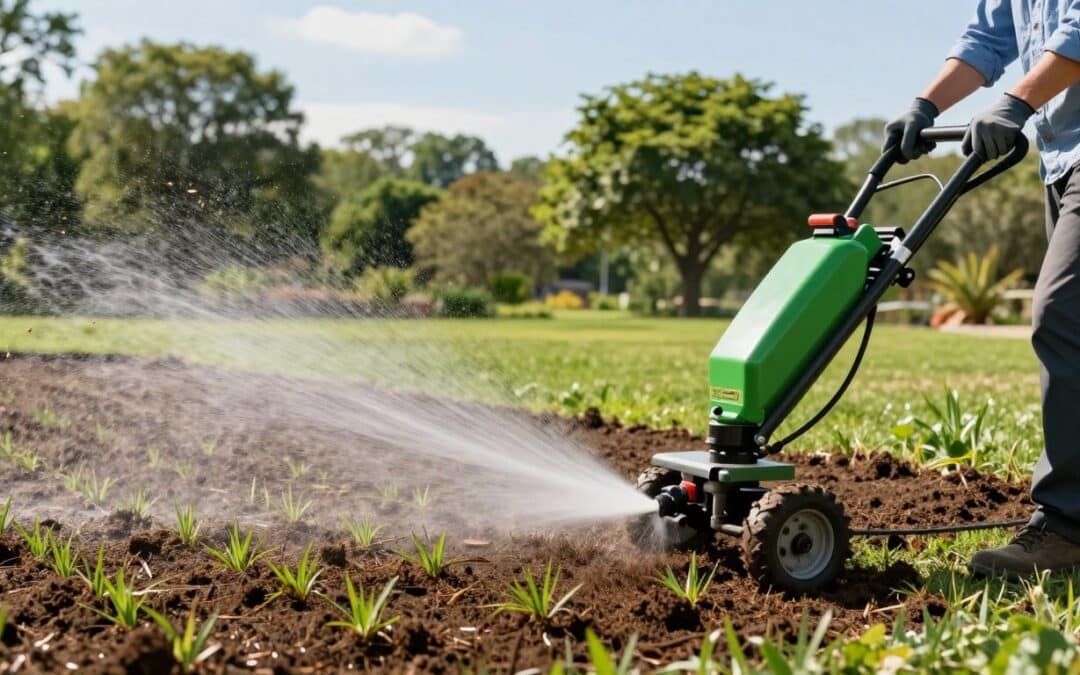

Are you weighing hydroseeding against traditional grass seed or sod for a new lawn? Homeowners, contractors, and landscapers often face the same question: which method delivers the best balance of cost, time, and long-term results? Hydroseeding is a practical process that blends seeds, mulch, water, fertilizer, and a dye into a protective slurry. The mixture is sprayed onto prepared soil to promote even germination and faster coverage than hand seeding.
This guide compares hydroseeding, traditional seeding, and sod across the metrics that matter most: upfront costs, establishment time, and the quality of the finished grass. Hydroseeding has been used for decades—popularized mid-20th century for large-scale projects—and remains a favored method for tackling erosion and establishing turf over larger areas.
Who this is for: homeowners and property managers planning a medium-to-large lawn, contractors evaluating options for a job, or anyone considering a reliable method to establish a new lawn with good long-term results. Ready to see which option fits your project? If you’re in our service area, find us on the map: view service area. For a fast local quote, check our hydroseeding services.
Introduction to Hydroseeding and Lawn Establishment Methods

If you’re planning a new lawn, it helps to understand the main establishment options so you can pick the right one for your yard. Below we cover hydroseeding, traditional seeding, and sod, plus when each method makes the most sense based on area, budget, and desired timeline.
What Is Hydroseeding?
Hydroseeding (also called hydromulching) is a sprayed application that mixes grass seed, water, mulch, fertilizer, and often a green dye into a single slurry. The slurry is applied evenly over prepared ground to encourage uniform germination and protect seeds from erosion and displacement.
Traditional Seeding and Sod Overview
Traditional seeding involves broadcasting dry grass seed by hand or machine, then typically adding mulch and fertilizer in separate steps. It’s the most budget-friendly option for small, flat lawns. Sod, by contrast, is pre-grown grass on a soil mat that’s rolled out for an instant lawn — great when you need immediate green cover but willing to pay a premium.
User Intent: Why Choose One Method Over Another?
Choose hydroseeding for medium-to-large areas (roughly 2,000 sq ft and up or acre-scale projects) where erosion control and consistent coverage matter. Traditional seeding is best for small yards or tight budgets. Sod fits projects that demand day-one appearance — sports fields, high-visibility landscapes, or premium residential installs.
| MethodProsConsBest For | |||
| Hydroseeding | Fast application, uniform growth, excellent erosion control | Needs consistent watering early on | Medium-to-large areas (2,000+ sq ft) |
| Traditional Seeding | Lowest upfront cost, simple materials | Longer to establish; can be patchy | Small, flat lawns; tight budgets |
| Sod | Immediate coverage and usable lawn | Higher cost, limited grass variety | Quick fixes, premium projects |
Still unsure which option fits your yard? Read our blog post Choosing the Right Grass for Your Yard for seed and grass type tips, or explore our hydroseeding services to get a tailored recommendation and local quote.
Hydroseeding: Process, Benefits, and Considerations

Hydroseeding is a practical landscaping method that relies on a carefully balanced slurry to establish a uniform, healthy lawn quickly across larger areas. Below we break down what goes in the mix, why it works, and what to watch for during establishment.
The Hydroseeding Slurry: Seeds, Mulch, Fertilizer, and Additives
The slurry is the core of hydroseeding. Typical components include:
- Water: The carrier that distributes everything evenly across the ground.
- Grass seed: Blends are chosen by region and intended use—mixes for sun, shade, drought tolerance, or heavy foot traffic.
- Fertilizer: Starter nutrients to support early root growth and healthy establishment.
- Mulch: Paper, wood fiber, or blends that retain moisture and protect seeds from erosion and birds.
- Additives: Tackifiers keep the mix anchored on slopes; biostimulants or wetting agents improve moisture retention and germination speed.
Many mixes include a green dye so applicators can see coverage and ensure an even application. The result is a protective blanket that helps seeds stay put and retain moisture for germination.
Advantages of Hydroseeding for Lawns and Landscaping
Hydroseeding offers several clear benefits:
- Faster, more efficient application compared with hand seeding—ideal for larger areas.
- Uniform coverage that reduces patchiness and improves visual results.
- Custom seed blends let you match grasses to your climate and use (e.g., fescue blends, rye mixes, Kentucky bluegrass mixes).
- Better erosion control on slopes when compared with dry seeding.
- Over time, many hydroseeded lawns develop a deep root structure that supports drought resilience and long-term health.
These strengths make hydroseeding especially useful for sites where erosion is a concern—roadside slopes, new construction lots, and hillsides.
Potential Drawbacks and Watering Requirements
Hydroseeding does have considerations to plan for. Newly applied slurry needs consistent moisture to germinate properly. As a rule of thumb, most projects require frequent watering during the first 1–3 weeks to keep the mulch moist; many recommended schedules call for 2–3 short waterings per day early on, then gradually reduce frequency while increasing duration to encourage roots to reach deeper soil.
Other drawbacks:
- Not always cost-effective for very small lawns—traditional seeding may be cheaper for patches under ~2,000 sq ft.
- DIY hydroseeding can be done but often underperforms compared with professional equipment and experience.
- Some mulch types (paper) must be kept consistently damp or they can crust; higher-performance mulches and BFMs resist crusting but raise material costs.
When to choose hydroseeding: pick hydroseeding when you need uniform results across medium-to-large areas, when slope or erosion risk exists, or when you want a faster, less labor-intensive application than traditional seeding. For erosion-specific guidance, see our post on Hydroseeding for Erosion Control.
Ready to compare options for your property? Learn about our local hydroseeding services and get a site-specific recommendation.
Comparing Costs: Hydroseeding, Traditional Seeding, and Sod

Cost is a major factor when choosing between hydroseeding, seeding, or sod. Below is a straightforward breakdown of typical price ranges and the hidden line items that often affect your final bill. Use the examples to estimate what each option might cost for your yard size.
Cost Breakdown per Square Foot and Acre
Typical industry ranges (these vary by region, seed mix, and site prep needs):
- Traditional Seeding: Around $0.02 per sq ft (roughly $680–$1,050 per acre).
- Hydroseeding: Generally $0.05–$0.20 per sq ft (about $2,000–$4,000 per acre).
- Sod: Typically $0.30–$0.83 per sq ft (approximately $13,068–$36,154 per acre).
These figures show that traditional seeding is usually lowest up front, hydroseeding sits in the middle, and sod is the most expensive. Remember: price per square foot can swing based on seed type, mulch choice, and whether soil amendments or grading are needed.
Labor and Equipment Cost Considerations
Labor and equipment influence the final cost more than many homeowners expect:
- Hydroseeding: Reduces labor because seed, mulch, and fertilizer are applied in one pass with specialized equipment. Professionals include equipment and operator costs; DIYers can rent hydroseeders for a few hundred dollars per day for 300–600 gallon units.
- Traditional seeding: Lower material costs but potentially higher labor for multiple passes (seed, mulch, fertilizer), and more follow-up overseeding if patches develop.
- Sod: High material and installation labor costs — handling, cutting, and rolling sod is labor-intensive.
Hidden Costs to Budget For
- Soil testing and amendments (lime, compost, topsoil)
- Grading, erosion control measures, or hydro-matting on steep slopes
- Delivery fees for mulch, seed, or sod
- Additional watering infrastructure or irrigation adjustments
- Follow-up seed or repairs if germination is uneven
How Project Size and Region Affect Price
Hydroseeding becomes more cost-effective as area increases because the equipment covers large areas quickly. For very small jobs (under ~2,000 sq ft), traditional seeding often remains the lowest-cost option. Regional factors — local labor rates, seed availability, and whether erosion control products are commonly used — will change pricing too. For commercial sites and acreage, hydroseeding frequently offers the best balance of cost and results.
Want a quick estimate? Example calculations for common yard sizes (use these as a starting point):
- 5,000 sq ft: Traditional seeding ≈ $100; Hydroseeding ≈ $250–$1,000; Sod ≈ $1,500–$4,150
- 10,000 sq ft: Traditional seeding ≈ $200; Hydroseeding ≈ $500–$2,000; Sod ≈ $3,000–$8,300
These examples do not include soil prep, amendments, or specialized erosion control products.
We recommend getting 2–3 local quotes to compare line-item costs and service warranties. If you’d like a custom estimate or help deciding the best option for your lawn, request a quote for hydroseeding services and we’ll provide a site-specific recommendation.
Timeline and Results: Germination and Lawn Establishment

Understanding the timeline for seed germination and overall lawn establishment helps you plan watering, mowing, and when the area is ready for regular use. Timelines vary by seed type, climate, and site conditions, but the ranges below reflect typical results for hydroseeding compared with traditional seeding and sod.
Typical Growth Timeline for Hydroseeding
Hydroseeding generally speeds up visible growth because the protective slurry retains moisture and keeps seeds in contact with the soil. Expect initial germination in about 7–10 days for many cool-season mixes (ryegrass often sprouts fastest; Kentucky bluegrass is slower). After roughly 3–4 weeks, grass frequently reaches 3–4 inches tall and can be mowed carefully.
Full establishment — meaning the turf can tolerate regular foot traffic and normal use — commonly occurs within 6–10 weeks under favorable conditions (adequate moisture, proper soil prep, and suitable seed selection). Warm-season grasses follow a different seasonal timetable; they may germinate and establish more slowly in cool weather and faster in warm months.
Comparison with Traditional Seeding and Sod
Traditional dry seeding typically shows visible sprouts in a similar window if conditions are ideal, but it’s more prone to patchiness because loose seed can wash away or be eaten by birds. Full establishment with hand seeding also usually falls in the 6–10 week range, but results can be inconsistent without proper mulch or protection.
Sod provides an immediate green surface—day one looks finished—but the sod needs about 2–3 weeks to root into the underlying soil before it’s safe for heavy use. During that rooting period, sod is vulnerable to drying and requires careful watering.
Achieving Uniform and Healthy Lawns
Hydroseeding’s even slurry application reduces visible seams and bare spots you often see with sod or patchy hand seeding. When properly watered and maintained, many hydroseeded lawns develop deep root systems that improve drought tolerance and long-term health.
Quick timeline dos and don’ts:
- Do: Keep the area consistently moist during the first 1–3 weeks — short, frequent waterings are best early on.
- Do: Wait to mow until grass reaches about 3–4 inches and soil feels firm underfoot.
- Don’t: Walk heavily or place heavy objects on the area until roots are established (usually 6–10 weeks).
- Don’t: Let the mulch dry out completely in the first weeks — crusting can inhibit germination.
For more detail on timing and the first mow, see our guide When to Mow After Hydroseeding. If you want a site-specific timeline based on your seed mix and climate, we can help — contact our hydroseeding services for a tailored plan.
Step-by-Step Hydroseeding Process for a Successful Lawn

The success of your new lawn starts with a clear, step-by-step hydroseeding process. Below is a practical walkthrough — from soil testing to post-application care — plus links to resources and a checklist to help you plan materials, time, and costs.
Soil Testing and Preparation
Start by testing soil from several spots across the area; local extension services or commercial labs usually return results in about two weeks. Most cool-season grasses prefer a pH around 5.8–7.2, so amend with lime or sulfur as needed. Typical testing costs run about $25–$50, but check local providers for current pricing.
Next, clear weeds and debris, and grade the surface so that it sits around 2.5–3 inches below the final grade to reduce slurry runoff. If your ground is compacted or low in organic matter, spread a 2-inch blended topsoil/compost layer to improve seed-to-soil contact and nutrient availability.
Choosing Seeds, Mulch, and Fertilizers
Pick seed blends suited to your climate, sun/shade conditions, and intended use (e.g., high-traffic lawns vs. ornamental turf). For many homeowners this means blends of fescue, rye, or Kentucky bluegrass depending on the region. Select a starter fertilizer compatible with hydroseeding equipment and confirm the recommended application rate on the label.
Mulch choice affects moisture retention and erosion resistance. Paper mulch is economical but needs frequent moisture; wood fiber or blends offer better retention; Bonded Fiber Matrix (BFM) products are best for steep slopes and severe erosion control.
Mixing and Applying the Hydroseeding Slurry
Load water into the hydroseeder first, then add seed, fertilizer, mulch, and any additives while the agitator runs. Use the machine’s jet or mechanical agitation to create a uniform mixture — not too thin (runs off) and not too thick (clogs hoses). The green dye helps ensure you see even coverage during application.
Spray the slurry evenly across the prepared area using a hose, boom, or gun. Overlap passes slightly to avoid missed strips. On slopes, use tackifiers or BFM to improve adhesion. If renting equipment, inspect pump condition and agitator paddles before you start.
Post-Application Care and Watering
Proper watering is critical in the first weeks. A common regimen is 2–3 short waterings per day for the first 7–14 days (keeping the mulch constantly damp), then gradually reduce frequency and increase duration over the next 6–7 weeks to encourage deep root growth. Avoid walking on the area until the turf is established.
Additional maintenance tips:
- Keep pets and foot traffic off seeded areas until roots hold (usually 6–10 weeks).
- Monitor for dry spots and irrigate accordingly — moisture consistency matters more than volume early on.
- Clean hydroseeding equipment promptly after use to prevent dried slurry buildup.
- For steep or hard-to-access slopes, consider professional application to reduce risk and improve results.
Tools & consumables checklist (typical): hydroseeder (rental if DIY), seed blend, mulch (paper/wood/BFM), starter fertilizer, tackifier (for slopes), hand tools for prep, and a reliable water source. For more on preparing your soil, see How to Test Your Lawn Soil.
If you’d rather have professionals handle mixing, application, and follow-up, view our local hydroseeding services and request a custom estimate — we’ll recommend seed types, mulch options, and a watering schedule tailored to your site.
DIY Hydroseeding: Equipment, Tips, and Best Practices
Tackling a DIY hydroseeding project can save money and be satisfying — but it’s best for the right size job and with the proper prep. Below are practical tips on equipment, mixing, troubleshooting, and a quick checklist to help you decide if DIY hydroseed is the right option for your yard.
Is DIY Right for You?
Quick checklist:
- Yard size under ~5,000 sq ft — manageable for rental units
- Mostly flat or gently sloped terrain (steep slopes favor professional application)
- Time available for frequent watering (daily short waterings initially)
- Comfort with equipment rental, mixing, and cleanup
If you meet most of these, DIY hydroseeding can be a good fit. For larger or steep jobs, contacting professionals is safer and often more cost-effective.
Equipment Rental and Types of Hydroseeders
Rental hydroseeders are commonly available in 300- and 600-gallon sizes and generally rent for a few hundred dollars per day (prices vary by region and vendor). There are two main machine types:
- Jet agitation machines: Simpler and less expensive — they work well for residential jobs and paper-based mulches.
- Mechanical agitation machines: More robust mixing for heavier wood-fiber mulches and larger areas.
For first-time DIYers with small, flat lawns, a jet agitation unit is typically recommended.
Mixing Techniques and Slurry Consistency
Follow a reliable sequence when mixing: load water first, then while the agitator runs add seed, fertilizer, mulch, and additives. Aim for a uniform mix — not so thin it runs off and not so thick it clogs hoses. Test spray a small area to confirm coverage and consistency before full application.
Maintenance and Troubleshooting Common Issues
Common issues and fixes:
- Slurry too thick → add water in small increments to thin it down.
- Slurry too thin → add more mulch or reduce water to prevent runoff.
- Wood-fiber swelling and clogging in jet systems → mix in smaller batches and stir frequently.
After each use, thoroughly flush and clean the hydroseeder to prevent hardened slurry that can damage the machine.
Permits, Runoff, and Safety
Check local regulations if you’re working on slopes or near waterways — runoff ordinances or permit requirements may apply for larger projects. Use tackifiers or BFM products on slopes to reduce erosion risk and comply with local rules.
If you prefer to avoid rental logistics, machine setup, or steep terrain, consider professional services. We offer full-service hydroseeding and can advise whether a DIY approach or pro application is the best option for your site — view our hydroseeding services for details.
Hydroseeding Equipment and Technology Explained
Understanding the equipment behind hydroseeding helps you choose the right machine, mulch, and setup for your project—whether you’re renting for a DIY job or hiring a contractor. Below we explain the main system types, common unit sizes, and mulch options so you can match technology to site conditions and goals.
Jet Agitation vs. Mechanical Agitation Systems
There are two common agitation systems used in hydroseeders:
- Jet Agitation Systems: These use a centrifugal pump that recirculates a portion of the output back into the tank through jets. Jet systems have fewer moving parts and are more affordable to rent or buy. They work well with paper-based mulch and lighter blends, but can struggle with very heavy wood-fiber or bonded mixes.
- Mechanical Agitation Systems: These machines use a rotating shaft with paddles to aggressively mix the tank contents. Mechanical agitation handles thick wood-fiber mulches and Bonded Fiber Matrix (BFM) products reliably, making them better suited to larger commercial jobs or severe erosion-control projects—at the cost of higher equipment complexity and price.
Hydroseeder Sizes and Drive Technologies
Hydroseeders range from compact 100–300 gallon units up to large trailer-mounted systems (1,000–5,000+ gallons). Typical categories:
- Small units (100–300 gal): Easy to transport on a pickup—good for small residential yards and short runs.
- Medium units (300–1,000 gal): Common for most residential and small commercial projects—balance capacity and maneuverability.
- Large units (1,000–5,000+ gal): Designed for large acreage, reclamation, and heavy-duty commercial work.
Pump and drive choices matter too—centrifugal and vortex pumps are common, and hydraulic drives reduce belt-slippage issues on heavy-use machines. When renting, prefer units with well-maintained pumps and recent service records to avoid mid-job failures.
Mulch Types: Paper, Wood Fiber, BFM, and Alternatives
Mulch selection strongly affects moisture retention, erosion resistance, and overall results:
- Paper mulch: Least expensive and fine for flat residential lawns; it must stay consistently damp to avoid crusting.
- Wood fiber mulch: Better moisture retention and erosion resistance—popular for many projects and mixes well in both jet and mechanical systems (though very heavy wood fiber is easier in mechanical systems).
- Wood/paper blends: Balance cost and performance—good all-around option.
- Bonded Fiber Matrix (BFM): Contains tackifiers and bonding agents to resist runoff and provides the best erosion control on steep slopes and channels.
- Alternatives: Cotton fiber, straw, or specialized pourable formulations are available for niche needs.
Actionable guidance: choose paper or blends for low-cost, low-slope residential lawns; select wood fiber or blends for better moisture retention; use BFM or bonded products for slopes, streambanks, or where local ordinances require enhanced erosion control.
Red Flags When Renting or Buying Equipment
- Old or noisy pumps—sign of wear and higher failure risk.
- Worn agitator paddles or damaged tank linings.
- Poor maintenance records or no recent service history from the rental vendor.
- Missing or damaged hoses, nozzles, or fittings.
Ask vendors about recent maintenance, test the spray on a small area before full application, and confirm the unit is rated for the mulch type you plan to use.
Overall, matching the right hydroseeding equipment and mulch to your site—ground slope, soil condition, and erosion risk—will improve results and lower the chance of costly rework. If you need help selecting equipment or mulch for your lawn, we can advise on the best options for your project and local soil conditions.
Optimal Timing and Applications for Hydroseeding
Timing matters with hydroseeding: pick the right season and you’ll reduce watering, speed germination, and improve establishment. Hydroseeding is versatile and works for residential yards, commercial landscaping, and large reclamation or erosion-control projects when matched to the proper seed blend and mulch.
Best Seasons: Fall and Spring Hydroseeding
Fall and spring are generally the best times to hydroseed. Cooler temperatures and more reliable rainfall during these seasons lower irrigation needs and help seeds establish strong roots. Early fall is often ideal because grass can develop roots before winter dormancy and then take advantage of spring moisture.
Spring works well too, but spring hydroseeding may require more attentive watering if summer heat follows. Avoid midsummer applications unless you have abundant water and irrigation in place—hot, dry conditions make germination and early growth difficult.
Commercial and Residential Use Cases
Hydroseeding is effective across many project types. For homeowners, it produces a uniform, healthy lawn quickly—especially useful on new construction lots with exposed soil. Commercial uses include office parks, retail centers, apartment complexes, and highway right-of-ways where consistent coverage and erosion control are priorities.
Erosion Control, Mine Reclamation, and Special Projects
Hydroseeding is widely used for erosion control on slopes, streambanks, and construction sites to prevent runoff. It’s also common in mine reclamation and large-scale restoration projects where rapid revegetation is required. For very steep or highly erosive sites, contractors often use Bonded Fiber Matrix (BFM) hydromulch to maximize adhesion and reduce soil loss.
Specialized applications include landfill alternative daily covers, athletic fields, golf course roughs, and revegetating fire-damaged landscapes. To see example project work and methods, check our project case studies or view our service area on the map: see service area.
Conclusion
Deciding between traditional seeding, sod, and hydroseeding comes down to budget, timeline, and the long-term results you want. For many homeowners and property managers, hydroseeding hits the sweet spot: it’s more affordable than sod, typically establishes faster and more uniformly than dry seeding, and provides strong erosion control for medium-to-large areas.
Quick recap:
- Traditional seeding: Lowest upfront cost but slower and often patchier results.
- Sod: Instant green lawn but highest cost and limited grass variety options.
- Hydroseeding: Mid-range cost, reliable uniform results, and good long-term root development.
Typical expectations: hydroseeding usually runs about $0.05–$0.20 per square foot, produces visible sprouts in roughly 7–10 days, and can reach full establishment in about 6–10 weeks under good conditions. Keep in mind watering and proper soil prep are critical during early weeks to achieve these results.
If you’re ready to move forward, request a custom estimate — request a quote for hydroseeding services — or find our service area on the map. Prefer to talk through options? Contact us and we’ll recommend the best approach for your lawn, including seed blends, mulch choices, and a site-specific watering plan.